Swift工程项目框架配置方案@JobsKits#
Swift工程项目框架配置方案@JobsKits#
一、一些基本的原则#
1、不到万不得已,不要用Objc库#
- 既然是Swift工程,那么就尽可能的不要调用Objc库,否则我们为什么不用Objc写工程项目?不要既当又立。特别是在有优秀平替的情况下。相信互联网是在不断向前发展的,新出的轮子可能稳定性来讲可能不如老旧的(特别是那种很多年不更新的库,不到万不得已,慎用!),但是从调用和内存包括向前兼容等方面,一定是优于老旧框架的。否则为什么要开发新版本?即便是Apple公司,也是看到了Objc的一些不足,所以才下了很大的决心从Objc迁移到Swift,相信迁移所造成的各方损耗和带来的优势,也是经过各方多轮评估后才做的取舍!
- Objc库需要导入头文件,而且头文件的导入在编译阶段同样存在循环引用的问题(编译的时候,一定是按照加载的顺序,自上而下的编译),那么在某些极端的情况下,引入的位置不对,就会造成编译不通过(亲测)。而Swift在工程内部不需要导入文件,除非在不同工程(跨域),比如利用CocoaPods管理的第三方才需要进行导入。所以,既然是系统做了优化的,我们就要顺势而为。
- 导入库,一般情况下,它会向后兼容,导入一些老旧的
*.framework库,造成打包体积过大的隐患(并不能每次都精确复现,这里只是讲风险与隐患)。这里的一个例子就是过期的模拟器配件。老旧的Api只要你调用了就一定会指向老旧的*.framework,会影响打包大小,但是不一定影响运行时的内存情况 - 对于一些老旧库(超过5年不维护的库)如果实在要用,就需要手动集成自项目,而不是CocoaPods管理
2、用开源播放器#
- 市面上,有开源的音视频播放器
- 强烈建议不要用腾讯等中国大陆大厂出品的播放器
- 魔改同样需要学习成本
- 对核心的部分做了不同程度的封装
- 内容过滤(可能今天有种声音是说海外版不管,但是如果收紧,是不是我们全不要推翻重来?)
- 播放器用大厂SDK的支持方观点:能最小成本接入
- 坚持自研播放器的观点:
- 播放器的目的:对特定格式里面蕴含的信息,进行编解码。播放的特效,是一个文件(或许是
*.json格式,亦或许是特有格式) - 能完全从底层开始修改,方便未来对视频流进行加/解密 (反爬,反编译)
- 大厂播放器,可能也不方便魔改(可能关键部分早已封装成
*.framework或者*.a) - 如果大厂播放器政策有所改变,进行业务收紧,我们也需要较大开销去应对这种变化(iOS/Android2端)如果多个App,每个App内部我们都需要进行替换
- 播放器的目的:对特定格式里面蕴含的信息,进行编解码。播放的特效,是一个文件(或许是
二、我对iOS开发的认知#
- 方向隶属于大前端
- 前端相对于后段的特点
- 数据轻量级,一般不负责存储,或者是只存储轻量级的数据。除非那种国民级App(但他们都有架构组,框架内部维护使用,极少公开)
- 后端的语言可以万年Java8(语言IDE、SDK层面)相对于前端更加的稳定(前端3个月一次小更新,5个月一次大更新)
- 每个人对于需求理解的方式,包括二次封装的Api粒度认识不统一
- 前端对于一些业务层面的数据计算不需要太关心,主要精力应该集中于UI绘制渲染上
- 后端原则情况下,是不信任前端发送的任何数据的(看具体项目的安全阀值,容错度)
- 充分利用UIButton的便捷性,使其作为一个UI容器,合理的利用此UI控件的内部子控件,有利于去节省代码,方便拓展。内部携带:
- 背景图层、
- 一个子UIImageView
- 主标题Label
- 副标题Label
- 绘制UI + 数据请求 + 数据处理 == 成品
- 数据处理:[利用quicktype自动建立数据模型]()
三、我的构架方案#
1、选用的(外源)第三方框架#
基础配置框架
- ReactiveSwift 新版本支持 arm64 模拟器
- RxCocoa
- RxRelay
- NSObject+Rx
UI约束
网络请求框架(多线程异步二次封装)
- YTKNetwork:Objc库,并不建议用,但是他对AFNetworking(已永久停更)进行了一个很好的二次封装(封装点在于开辟多线程以应对一个页面上多个请求的特殊局面)。而Swift平台上的请求框架Alamofire还未对此场景进行深入的兼容
图片处理(异步)
- Kingfisher Swift 平台上对于的 SDWebImage 平替
动画(播放器)
音视频播放器
聊天工具
- LiveChat 需付费
一些工具类
- 一些优秀的UI库
- JXSegmentedView: 子控制器切换
- ESPullToRefresh:Swift 平台 MJRefresh 平替(暂不支持水平特征)
- JXBanner:轮播图
- LunarSwift:无第三方依赖的日历工具
- CoreXLSX:Excel
- FSPopoverView:下拉三角小菜单
- SwiftEntryKit:用 Swift 编写的简单而功能强大的内容展示器
- AMPopTip:自定义弹出框的弹出方向以及指向其原点的箭头、颜色、边框半径和字体
- SkeletonView:骨架屏/闪动占位
- SwiftMessages:非常灵活的 UIKit 和 SwiftUI 视图和视图控制器展示库
- ScreenProtectorKit:防止屏幕截图并保护后台应用程序快照
- PhoneNumberKit:电话号码工具包:用于解析、格式化和验证国际电话号码。灵感来源:
Google.libphonenumber - IQKeyboardManagerSwift
- 一些优秀的UI库
2、我的封装(重点)#
2.1、对UIViewController的封装#
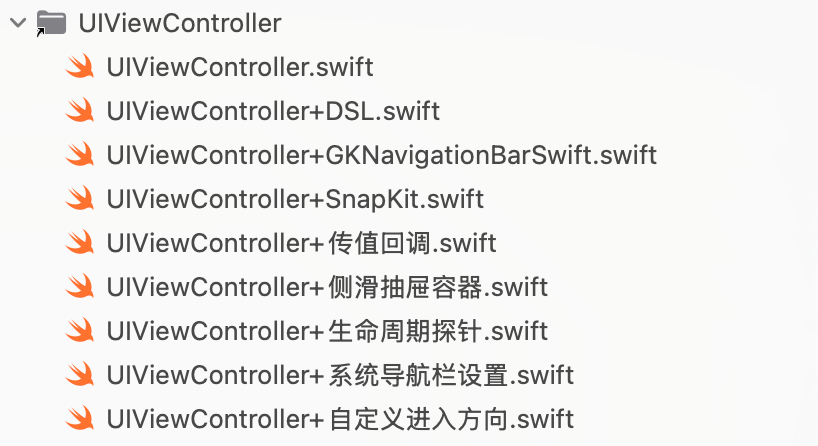
解决某些情况下,多次push或者present的Bug
- 正向push带参传值
- 自定义出现的方向
- 自定义出现的方式是push还是present
- 退出页面需要回传的参数
DemoDetailVC()
    .byData("https://www.baidu.com")
    .byDirection(.fromBottom)   // 👈 下
    .byPush(self)
    .byCompletion { print("❤️结束❤️ fromBottom") }
DemoDetailVC() .byData(3.14)// 基本数据类型 .onResult { name in print("回来了 \(name)") } .byPresent(self) .byCompletion{ print("结束") }
2.2、对UIView层的封装格式#
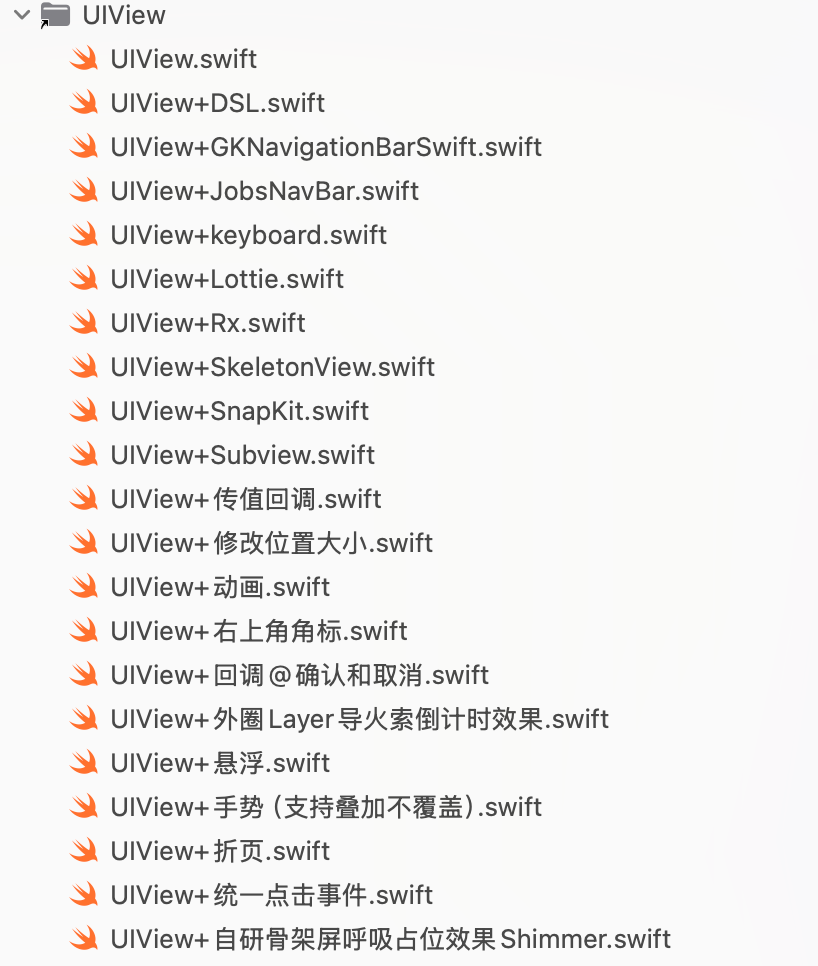
懒加载+代码块,在实际用的地方利用这个
UIView的alpha或者hidden属性进行唤起利用
byAddTo将约束全部写进此闭包中,代码不再割裂。因为约束也是对此UI控件的补充说明private lazy var tvBlue: UITextView = { [unowned self] in UITextView() .byAttributedText(NSMutableAttributedString( string: "🔗 默认蓝色链接(系统样式):", attributes: [ .font: UIFont.systemFont(ofSize: 15), .foregroundColor: UIColor.secondaryLabel ]) .add(NSAttributedString( string: " Apple 官网", attributes: [ .link: URL(string: "https://www.apple.com")!, .font: UIFont.boldSystemFont(ofSize: 16) ])) .add(NSAttributedString( string: "\n客服电话:400-123-4567", attributes: [.font: UIFont.systemFont(ofSize: 15)] ))) .byEditable(false) .bySelectable(true) .byDataDetectorTypes([.link, .phoneNumber]) // 系统自动识别 .byTextContainerInset(UIEdgeInsets(top: 8, left: 10, bottom: 8, right: 10)) .byRoundedBorder(color: .systemGray4, width: 1, radius: 8) .byAddTo(self.view) { [unowned self] make in make.top.equalTo(self.tv.snp.bottom).offset(12) // 紧跟在 tv 下面 make.centerX.equalToSuperview() make.height.equalTo(36) } }()旋转视图
btn.onTap { [weak self] btn in
			 guard let _ = self else { return }
       btn.playTapBounce(haptic: .light)  // 👈 临时放大→回弹(不注册任何手势/事件)
       if btn.jobs_isSpinning {
           // 暂停旋转
           btn.bySpinPause()
           // 暂停计时(保留已累计秒,不重置)
           btn.timer?.pause()        // ✅ 推荐:你的统一内核挂在 button.timer 上
           // 如果你有封装方法,则用:btn.pauseTimer()
           JobsToast.show(
               text: "已暂停旋转 & 计时",
               config: .init().byBgColor(.systemGreen.withAlphaComponent(0.9)).byCornerRadius(12)
           )
       } else {
           // 恢复旋转
           btn.bySpinStart()
           // 恢复计时(从暂停处继续累加)
           btn.timer?.resume()       // ✅ 推荐
           // 如果你有封装方法,则用:btn.resumeTimer()
           JobsToast.show(
               text: "继续旋转 & 计时",
               config: .init().byBgColor(.systemGreen.withAlphaComponent(0.9)).byCornerRadius(12)
           )
       }
}
悬浮视图
UIView().bySuspend { cfg in
    cfg
        .byContainer(view)
        .byFallbackSize(CGSize(width: 88, height: 44))
        .byDocking(.nearestEdge)
        .byInsets(UIEdgeInsets(top: 20, left: 16, bottom: 34, right: 16))
        .byHapticOnDock(true)
}
UIView().suspend( .default .byContainer(view) .byFallbackSize(CGSize(width: 88, height: 44)) .byDocking(.nearestEdge) .byInsets(UIEdgeInsets(top: 20, left: 16, bottom: 34, right: 16)) .byHapticOnDock(true) )角标提示@右上角提示文案
展示
右上角自定义文字
UIView().byCornerBadgeText("NEW") { cfg in
            cfg.byOffset(.init(horizontal: -6, vertical: 6))
                .byInset(.init(top: 2, left: 6, bottom: 2, right: 6))
                .byBgColor(.systemRed)
                .byFont(.systemFont(ofSize: 11, weight: .bold))
                .byShadow(color: UIColor.black.withAlphaComponent(0.25),
                          radius: 2,
                          opacity: 0.6,
                          offset: .init(width: 0, height: 1))
        }
右上角小红点
UIView().byCornerDot(diameter: 10, offset: .init(horizontal: -4, vertical: 4))// 红点
关闭
UIButton(type: .system)
    /// 事件触发@点按
    .onTap { [weak self] sender in
        guard let self else { return }
        sender.isSelected.toggle()
        if sender.isSelected {
            sender.byCornerDot(diameter: 10, offset: .init(horizontal: -4, vertical: 4))
        } else {
            sender.removeCornerBadge()
        }
        JobsToast.show(
            text: "优惠@点按事件",
            config: JobsToast.Config()
                .byBgColor(.systemGreen.withAlphaComponent(0.9))
                .byCornerRadius(12)
        )
    }
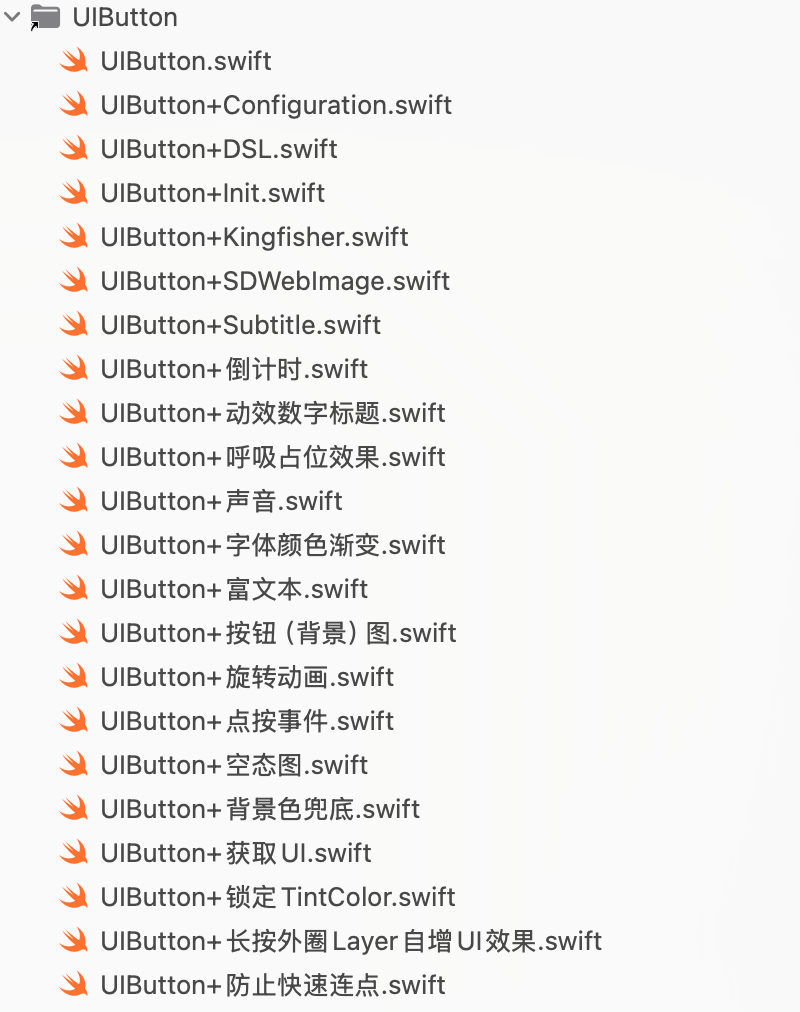
2.3、对UIButton按钮的封装#
2.3.1、利用分类作用于UIButton#
private lazy var exampleButton: UIButton = {
    UIButton.sys()
        /// 锁死标题颜色:任何 state 都保持同一种颜色,不跟 tint / 系统态自动变化
        .byLockTitleColor(.red)
        /// 图片吃 tint,但 tint 锁死为某个颜色
        .byLockTintColor(.red)
        /// 只锁 Background(背景色不随状态变)
        .byLockBackgroundColor(.red)
        /// 只锁 Border(边框色不随状态变,iOS 15+)
        .byLockBorderColor(.red)
        /// 背景色@按照不同的状态
        .byBackgroundColor(.systemGreen, for: .normal)
        .byBackgroundColor("#2F2F2F".cor, for: .disabled) // 对应按钮不可点击的状态
        /// 背景图片
        .byBackgroundImage("背景图片".img, for: .normal)
        /// 字体颜色渐变@只处理主标题(titleLabel)
        .byGradientMainTitle(colors: [UIColor(r: 221, g: 221, b: 221), UIColor(r: 127, g: 126, b: 126)], direction: .leftToRight)
        /// 字体颜色渐变@只副标题渐变
        .byGradientSubtitle(colors: [UIColor(r: 221, g: 221, b: 221), UIColor(r: 127, g: 126, b: 126)], direction: .topLeftToBottomRight)
        /// 字体颜色渐变@主副一致
        .byGradientTitlesSame(colors: [UIColor(r: 221, g: 221, b: 221), UIColor(r: 127, g: 126, b: 126)], direction: .leftToRight)
        /// 普通字符串@设置主标题
        .byTitle("显示", for: .normal)
        .byTitle("隐藏", for: .selected)
        /// 字体颜色@按照不同的状态
        .byTitleColor("#2F2F2F".cor, for: .normal)
        .byTitleColor("#BBBBBB".cor, for: .disabled) // 对应按钮不可点击的状态
        .byTitleFont(.systemFont(ofSize: 16, weight: .medium))
        /// 普通字符串@设置副标题
        .bySubTitle("显示", for: .normal)
        .bySubTitle("隐藏", for: .selected)
        .bySubTitleColor(.systemBlue, for: .normal)
        .bySubTitleColor(.systemRed, for: .selected)
        .bySubTitleFont(.systemFont(ofSize: 16, weight: .medium))
        /// 富文本字@设置主标题
        .byRichTitle(JobsRichText.make([
            JobsRichRun(.text("¥99")).font(.systemFont(ofSize: 18, weight: .semibold)).color(.systemRed),
            JobsRichRun(.text(" /月")).font(.systemFont(ofSize: 16)).color(.white)
        ]))
         /// 富文本字@设置副标题
        .byRichSubTitle(JobsRichText.make([
            JobsRichRun(.text("原价 ")).font(.systemFont(ofSize: 12)).color(.white.withAlphaComponent(0.8)),
            JobsRichRun(.text("¥199")).font(.systemFont(ofSize: 12, weight: .medium)).color(.systemYellow)
        ]))
        /// 主标题和副标题之间的距离(兼容 iOS12+)
        .byTitlePadding(4.h)
        /// 按钮图片@图文关系
        .byImage("eye.slash".sysImg, for: .normal)                // 未选中图标
        .byImage("eye".sysImg, for: .selected)                    // 选中图标
        /// iOS15专用@清除偏移
        .byClearConfigurationBackground()
        /// 按钮@图文位置关系
        .byImagePlacement(.top ,padding: 5)        // 通用(向下兼容)
        .byImagePlacementLegacy(.top, padding: 5)  // 只满足iOS13以下
        /// 按钮图文间距@iOS13(与下文互斥)
        .byTitleEdgeInsets(UIEdgeInsets(top: 0, left: 6, bottom: 0, right: -6))
        /// 按钮图文内边距@iOS12(与上文互斥)
        .byContentEdgeInsets(UIEdgeInsets(top: 4, left: 8, bottom: 4, right: 8))
        /// 点击@播放声音
        .byTapSound("Sound.wav")
        /// 普通@点按事件触发
        .onTap { [weak self] sender in
            guard let self else { return }
            sender.isSelected.toggle()
            // 文字与图标自动切换
            self.passwordTF.isSecureTextEntry.toggle()
            self.passwordTF.togglePasswordVisibility()
            print("👁 当前状态:\(sender.isSelected ? "隐藏密码" : "显示密码")")
        }
        /// 追加@点按事件触发
        .onTapAppend{ sender in
            print("追加的点按事件")
        }
        /// 右上角提示文案@小红点
        .byCornerDot(diameter: 10, offset: .init(horizontal: -4, vertical: 4))// 红点
        /// 右上角提示文案@文字
        .byCornerBadgeText("NEW") { cfg in
            cfg.byOffset(.init(horizontal: -6, vertical: 6))
                .byInset(.init(top: 2, left: 6, bottom: 2, right: 6))
                .byBgColor(.systemRed)
                .byFont(.systemFont(ofSize: 11, weight: .bold))
                .byShadow(color: UIColor.black.withAlphaComponent(0.25),
                          radius: 2,
                          opacity: 0.6,
                          offset: .init(width: 0, height: 1))
        }
        /// 普通@长按事件触发
        .onLongPress(minimumPressDuration: 0.8) { btn, gr in
             if gr.state == .began {
                 btn.alpha = 0.6
                 print("长按开始 on \(btn)")
             } else if gr.state == .ended || gr.state == .cancelled {
                 btn.alpha = 1.0
                 print("长按结束")
             }
         }
        /// 追加@长按事件触发
        .onLongPressAppend(minimumPressDuration: 0.8) { btn, gr in
            print("追加的长按事件")
        }
        .byAddTo(view) { [unowned self] make in
            make.top.equalTo(self.view.safeAreaLayoutGuide.snp.top).offset(40)
            make.left.right.equalToSuperview().inset(24)
            make.height.equalTo(44)
        }
        .byBorderColor(.cyan)
        .byBorderWidth(0.5)
        .byMasksToBounds(YES)
        .byClipsToBounds(YES)
        .byCornerRadius(8.h)
        /// UIButtonConfiguration
        if #available(iOS 15.0, *) {
            b.byConfiguration { c in
                c.byTitle("背景图:Base64 / URL")
                    .byBaseForegroundCor(.white)
                    .byContentInsets(.init(top: 16, leading: 16, bottom: 16, trailing: 16))
                    .byCornerStyle(.large)
                    .byImagePlacement(.trailing)
                    .byImagePadding(8)
            }
        } else {
            b.byTitle("背景图:Base64 / URL", for: .normal)
                .byTitleColor(.white, for: .normal)
                .byContentEdgeInsets(.init(top: 16, left: 16, bottom: 16, right: 16))
                .byBgColor(.systemBlue)
        }
}()
风险提示:一旦用了最新的
UIButtonConfiguration可能影响到老旧的Api的使用(直观感受,老旧Api配置的按钮将会不起效)可视UI(向下兼容,且启用
UIButtonConfiguration)- 普通文本配置主副标题(文本内容、文本字体颜色大小)
- 富文本配置主副标题
- 设置背景图片
- 设置背景色
- 前景图文位置关系(空间位置和距离)
- 操作Layer层:切角、描边
- 锁住tint
- snapkit约束
- 右上角提示(参考Objc库PPBadgeView)
事件
(点按、长按)事件封装 ➤ 绕过@selector和Target
(点按、长按)事件追加
点击播放声音
主副标题的数字动效
- 小数点后数字的处理(保留多少有效数字、定义小数部分的字体颜色大小)
- 小数点之前可以选择开启分隔符(国际3位、中国4位)
import JobsByUIKit

private let defaultStart: Double = 1234567890
/// 数字动效按钮@主标题(普通文本)
private lazy var btn_1: UIButton = {
    UIButton()
        .byLockBackgroundColor(.clear)
        .byTitle("\(Int(defaultStart))", for: .normal)
        .byTitleColor(.white, for: .normal)
        .byTitleFont(.DINPro.Bold(14.fz))
        .byImage("钱".img, for: .normal)
        .byImagePlacement(.right ,padding: 5.w)        // 通用(向下兼容)
        /// 数字动效按钮@关键配置
        .byAnimationTitleConfig({ cfg in
            cfg.byDuration(10) // 动画的作用时间
                .byFps(60) //
                .byTitleColor(.white, for: .normal)
                .byTitleFont(.DINPro.Bold(14.fz))
                .byStartValue("\(Int(0))") // 如果这个地方没有配置,则从按钮的主标题取值
                .byEndValue("\(Int(1000))") // 如果这个地方没有配置,则从按钮的主标题取值
                .byShowsDecimals(true)// 是否展示小数(默认不展示)
                .bySeparate(",")// 分隔符是 , 不写也行
                .byDecimals(2)// 保留2位小数(默认)
                .byTitleDecimalsCor(.red)
                .byTitleDecimalsFont(.DINPro.Bold(12.fz))
        })
        .onTap { [weak self] sender in
            guard let self else { return }
            /// 启动动效@回调倒计时行为:进行中(多次)
            sender.byStartAnim { m in
                print("title:", m.title ?? "nil",
                      "sub:", m.subTitle ?? "nil",
                      "seconds:", m.seconds)
            }
            /// 启动动效@回调倒计时行为:结束(一次)
            .byEndAnim {
                "动画结束".tr.toast
            }
        }
        .byAddTo(topBarBackgroundView) { [unowned self] make in
            /// TODO
        }
}()
/// 数字动效按钮@主标题(富文本)
private lazy var btn_2: UIButton = {
    UIButton.sys()
        // 初始展示:你原来的 rich title 仍然可以保留(首次显示用)
        .byRichTitle(JobsRichText.make([
            JobsRichRun(.text("¥99")).font(.systemFont(ofSize: 18, weight: .semibold)).color(.systemRed),
            JobsRichRun(.text(" /月")).font(.systemFont(ofSize: 16)).color(.white)
        ]))
        .byTitleColor(.white, for: .normal)
        .byImage("star.fill".sysImg, for: .normal)
        .byImagePlacement(.leading, padding: 8)
        .byBackgroundColor(.systemGreen)
        /// 数字动效按钮@关键配置➤主标题富文本Builder
        .byAnimationTitleConfig { cfg in
            cfg.byDuration(10)
                .byFps(60)
                .byStartValue("\(Int(0))")
                .byEndValue("\(Int(1000))")
                .byShowsDecimals(true)
                .bySeparate(",")
                .byDecimals(2)
                // 如果仍然希望 plain/fallback 的字体颜色也一致,可以保留
                .byTitleColor(.white, for: .normal)
                .byTitleFont(.DINPro.Bold(14.fz))
                .byTitleDecimalsCor(.red)
                .byTitleDecimalsFont(.DINPro.Bold(12.fz))
                // 主标题整体富文本(¥ + 数字 + /月)
                .byTitleAttributedBuilder { text, decimalsRange, _ in
                    // full: "¥1,234.56 /月"
                    let full = "¥\(text) /月"
                    let attr = NSMutableAttributedString(string: full)
                    // 数字段(含 ¥):红色 18 semibold
                    let numberRange = NSRange(location: 0, length: 1 + (text as NSString).length) // "¥" + text
                    attr.addAttributes([
                        .font: UIFont.systemFont(ofSize: 18, weight: .semibold),
                        .foregroundColor: UIColor.systemRed
                    ], range: numberRange)
                    // 后缀段:白色 16
                    let suffixStart = numberRange.length
                    let suffixRange = NSRange(location: suffixStart, length: (full as NSString).length - suffixStart)
                    attr.addAttributes([
                        .font: UIFont.systemFont(ofSize: 16),
                        .foregroundColor: UIColor.white
                    ], range: suffixRange)
                    // 小数段(如果存在):DINPro 12 + 红色(只改小数部分,不影响整数)
                    if let dr = decimalsRange {
                        // decimalsRange 是在 text 里的 range,要平移到 full 里(前面多了一个 "¥")
                        let shifted = NSRange(location: 1 + dr.location, length: dr.length)
                        attr.addAttributes([
                            .font: UIFont.DINPro.Bold(12.fz),
                            .foregroundColor: UIColor.red
                        ], range: shifted)
                    };return attr
                }
        }
        .onTap { [weak self] sender in
            guard let self else { return }

            // 你这里读 tf 的 start/end 只是业务参数;真正动画起终值由 config 的 startValue/endValue 控制
            // 如果你想“按输入框变更动画起终值”,需要在点击时重新调用 byAnimationTitleConfig 覆盖 start/end
            // 这里先按你原逻辑保留回调即可
            sender.byStartAnim { m in
                print("title:", m.title ?? "nil",
                      "sub:", m.subTitle ?? "nil",
                      "seconds:", m.seconds)
            }
            .byEndAnim {
                "动画结束".tr.toast
            }
        }
        .byAddTo(contentView) { [unowned self] make in
            make.top.equalTo(tf3Start.snp.bottom).offset(10)
            make.left.right.equalToSuperview().inset(16)
            make.height.equalTo(56)
        }
}()
/// 数字动效按钮@副标题(普通文本)
private lazy var btn_3: UIButton = {
    UIButton.sys()
        .byTitle("会员价格", for: .normal)
        .byTitleColor(.white, for: .normal)
        .byTitleFont(.systemFont(ofSize: 16, weight: .medium))
        .bySubTitle("原价 ¥199 /月", for: .normal)
        .bySubTitleColor(.white.withAlphaComponent(0.85), for: .normal)
        .bySubTitleFont(.systemFont(ofSize: 13))
        .byBackgroundColor("#2F2F2F".cor)
        /// 数字动效按钮@关键配置
        .byAnimationSubTitleConfig({ cfg in
            cfg.byDuration(10) // 动画的作用时间
                .byFps(60) //
                .bySubTitleColor(.blue)
                .bySubTitleFont(.DINPro.Bold(14.fz))
                .byStartValue("\(Double(tf1Start.text ?? "") ?? 99)") // 如果这个地方没有配置,则从按钮的主标题取值
                .byEndValue("\(Double(tf1End.text ?? "") ?? 199)") // 如果这个地方没有配置,则从按钮的主标题取值
                .byShowsDecimals(true)// 是否展示小数(默认不展示)
                .bySeparate(",")// 分隔符是 , 不写也行
                .byDecimals(2)// 保留2位小数(默认)
                .bySubTitleDecimalsCor(.red)
                .bySubTitleDecimalsFont(.DINPro.Bold(12.fz))
        })
        .onTap { [weak self] sender in
            guard let self else { return }
            /// 启动动效@回调倒计时行为:进行中(多次)
            sender.byStartAnim { m in
                print("title:", m.title ?? "nil",
                      "sub:", m.subTitle ?? "nil",
                      "seconds:", m.seconds)
            }
            /// 启动动效@回调倒计时行为:结束(一次)
            .byEndAnim {
                "动画结束".tr.toast
            }
        }
        .byAddTo(contentView) { [unowned self] make in
            make.top.equalTo(tf2Start.snp.bottom).offset(10)
            make.left.right.equalToSuperview().inset(16)
            make.height.equalTo(64)
        }
}()
/// 数字动效按钮@副标题(富文本)
private lazy var btn_4: UIButton = {
    UIButton.sys()
        .byTitle("限时折扣", for: .normal)
        .byTitleColor(.white, for: .normal)
        .byTitleFont(.systemFont(ofSize: 16, weight: .medium))
        // 初始展示:先给一个普通副标题(首次显示用)
        .bySubTitle("倒计时 199 秒", for: .normal)
        .bySubTitleColor(.white.withAlphaComponent(0.85), for: .normal)
        .bySubTitleFont(.systemFont(ofSize: 13))
        .byImage("clock".sysImg, for: .normal)
        .byImagePlacement(.leading, padding: 8)
        .byBackgroundColor(.systemPurple)
        .byCornerRadius(10)
        /// 数字动效按钮@关键配置➤副标题富文本Builder
        .byAnimationSubTitleConfig { cfg in
            cfg.byDuration(10)
                .byFps(60)

                // 这里的 start/end 才是副标题动画的数值来源
                .byStartValue("199")
                .byEndValue("9")

                // 倒计时一般不需要小数,这里关掉
                .byShowsDecimals(false)

                // 可选:给副标题的基础样式(非 builder 场景兜底)
                .bySubTitleColor(.white.withAlphaComponent(0.85), for: .normal)
                .bySubTitleFont(.systemFont(ofSize: 13))

                // ✅ 副标题整体富文本: "倒计时 199 秒"
                .bySubTitleAttributedBuilder { text, _, _ in
                    let prefix = "倒计时 "
                    let suffix = " 秒"
                    let full = prefix + text + suffix
                    let attr = NSMutableAttributedString(string: full)

                    // 全段默认(灰白 13)
                    attr.addAttributes([
                        .font: UIFont.systemFont(ofSize: 13),
                        .foregroundColor: UIColor.white.withAlphaComponent(0.85)
                    ], range: NSRange(location: 0, length: (full as NSString).length))

                    // 数字段强调(白色 13 medium,或你想要的高亮色)
                    let numberRange = NSRange(location: (prefix as NSString).length,
                                              length: (text as NSString).length)
                    attr.addAttributes([
                        .font: UIFont.systemFont(ofSize: 13, weight: .semibold),
                        .foregroundColor: UIColor.white
                    ], range: numberRange)

                    return attr
                }
        }

        .onTap { [weak self] sender in
            guard let self else { return }
            sender.byStartAnim { m in
                print("title:", m.title ?? "nil",
                      "sub:", m.subTitle ?? "nil",
                      "seconds:", m.seconds)
            }
            .byEndAnim {
                "动画结束".tr.toast
            }
        }
        .byAddTo(contentView) { [unowned self] make in
            make.top.equalTo(tf4Start.snp.bottom).offset(10)
            make.left.right.equalToSuperview().inset(16)
            make.height.equalTo(64)
            make.bottom.equalToSuperview().offset(-24)
        }
}()
2.3.2、利用继承作用于JobsButton#
解决在某些iOS版本向下兼容的情况下,无法把握
UIButton内部控件的生命周期,导致UI错版的问题
private lazy var btn1: JobsButton = {
    JobsButton()
        .byMode(.imageTopTextBottom)
        .byTitleLabel { lab in
            lab.byText("上图下文")
                .byTextColor(.red)
        }
        .bySubTitleLabel { lab in
            lab.byText("image -> title -> subtitle")
                .byTextColor(.blue)
        }
        // 前景图:内部 foregroundImageView(链式不丢 self)
        .byForegroundImageView { iv in
            iv.byContentMode(.scaleAspectFill)
                .byClipsToBounds()
                .kf_setImage("https://picsum.photos/200?random=111", placeholder: "Ani".img)
        }
        // 背景图:JobsButton 自己是 UIImageView
        .byContentMode(.scaleAspectFill)
        .byClipsToBounds()
        .kf_setImage("https://picsum.photos/600/200?random=11", placeholder: "Ani".img)
        .byImageTitleSpacing(6)
        .byTitleSubtitleSpacing(2)
        .byContentInsets(.zero)
        .byForegroundImageFixedSize(true)
        .addTapActionAppend { _ in
            print("btn1 tap #1")
            "点击了悬浮按钮:上图下文(tap #1)".toast
        }
        .addTapActionAppend { _ in
            print("btn1 tap #2 (append)")
            "点击了悬浮按钮:上图下文(tap #2 叠加)".toast
        }
        .addLongPressActionAppend { gr in
            guard gr.state == .began else { return }
            print("btn1 longPress #1 began")
            "长按了悬浮按钮:上图下文(longPress #1)".toast
        }
        .addLongPressActionAppend { gr in
            guard gr.state == .began else { return }
            print("btn1 longPress #2 began (append)")
            "长按了悬浮按钮:上图下文(longPress #2 叠加)".toast
        }
        .byBorderColor(.cyan)
        .byBorderWidth(0.5)
        .byMasksToBounds(YES)
        .byClipsToBounds(YES)
        .byCornerRadius(8.h)
        .byAddTo(view) { [unowned self] make in
            make.top.equalTo(self.hintLabel.snp.bottom).offset(18)
            make.left.equalToSuperview().offset(horizontalInset)
            make.right.equalToSuperview().inset(horizontalInset)
            make.height.equalTo(itemHeight)
        }
}()2.4、对UIGestureRecognizer手势的封装#
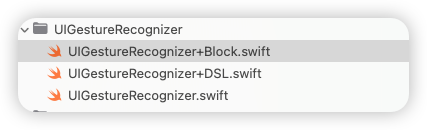

绕过@selector和Target,只关心加载的视图对象,以及响应方法
// MARK: - 点击 Tap
UIView().jobs_addGesture(
    UITapGestureRecognizer
        .byConfig { gr in
            print("Tap 触发 on: \(String(describing: gr.view))")
        }
        .byTaps(2)                       // 双击
        .byTouches(1)                    // 单指
        .byCancelsTouchesInView(true)
        .byEnabled(true)
        .byName("customTap")
)
// MARK: - 长按 LongPress UIView().addGestureRecognizer( UILongPressGestureRecognizer .byConfig { gr in if gr.state == .began { print("长按开始") } else if gr.state == .ended { print("长按结束") } } .byMinDuration(0.8) // 最小按压时长 .byMovement(12) // 允许移动距离 .byTouches(1) // 单指 )// MARK: - 拖拽 Pan UIView().jobs_addGesture( UIPanGestureRecognizer .byConfig { gr in let p = (gr as! UIPanGestureRecognizer).translation(in: gr.view) if gr.state == .changed { print("拖拽中: \(p)") } else if gr.state == .ended { print("拖拽结束") } } .byMinTouches(1) .byMaxTouches(2) .byCancelsTouchesInView(true) )// MARK: - 轻扫 Swipe(单方向) UIView().jobs_addGesture( UISwipeGestureRecognizer .byConfig { _ in print("👉 右滑触发") } .byDirection(.right) .byTouches(1) ) // MARK: - 轻扫 Swipe(多方向) let swipeContainer = UIView() swipeContainer.jobs_addGesture( UISwipeGestureRecognizer .byConfig { _ in print("← 左滑") } .byDirection(.left) ) swipeContainer.jobs_addGesture( UISwipeGestureRecognizer .byConfig { _ in print("→ 右滑") } .byDirection(.right) ) swipeContainer.jobs_addGesture( UISwipeGestureRecognizer .byConfig { _ in print("↑ 上滑") } .byDirection(.up) ) swipeContainer.jobs_addGesture( UISwipeGestureRecognizer .byConfig { _ in print("↓ 下滑") } .byDirection(.down) )// MARK: - 捏合 Pinch UIView().jobs_addGesture( UIPinchGestureRecognizer .byConfig { _ in } .byOnScaleChange { gr, scale in if gr.state == .changed { print("缩放比例: \(scale)") } } .byScale(1.0) )// MARK: - 旋转 Rotate UIView().jobs_addGesture( UIRotationGestureRecognizer .byConfig { _ in } .byOnRotationChange { gr, r in if gr.state == .changed { print("旋转角度(弧度): \(r)") } } .byRotation(0) )// MARK: - 直接设置手势(已锚定视图) let views = UIView() .addTapAction { gr in print("点击 \(gr.view!)") } .addLongPressAction { gr in if gr.state == .began { print("长按开始") } } .addPanAction { gr in let p = (gr as! UIPanGestureRecognizer).translation(in: gr.view) print("拖拽中: \(p)") } .addPinchAction { gr in let scale = (gr as! UIPinchGestureRecognizer).scale print("缩放比例:\(scale)") } .addRotationAction { gr in let rotation = (gr as! UIRotationGestureRecognizer).rotation print("旋转角度:\(rotation)") }
2.5、对UITextView的封装(含输入监控过滤)#
输入监控 + 退格监控
private lazy var tv1: UITextView = {
    UITextView()
        .byFont(.systemFont(ofSize: 16))
        .byKeyboardType(.default)
        .byEditable(true)
        .bySelectable(true)
        .byTextContainerInset(UIEdgeInsets(top: 8, left: 10, bottom: 8, right: 10))
        .byRoundedBorder(color: .systemGray4, width: 1, radius: 8)
        .byPlaceHolder("哈哈哈哈".tr)
        .byPlaceHolderCor(.blue)
        .byPlaceHolderFont(.boldSystemFont(ofSize: 15))
        .byHintLimit(12) { lb in
            lb.byFont(.monospacedDigitSystemFont(ofSize: 11, weight: .semibold))
                .byTextColor(.red)
        }
        .byOnInput(limit: nil) { [unowned self] char, value, mode, isLimited, text ,tv in
            // text 就是当前 UITextView.text(保证不是 nil,空就是 "")
            // value 仍然是“本次变更后的值”(由监听器计算出来的 new)
            // char:删除/回车时为 ""
            // mode:space/delete/return/normal
            // isLimited:是否设置了限制(limit != nil)
            print("✏️ char='\(char)' value='\(value)' mode=\(mode) limited=\(isLimited) text='\(text)'")
        }
        .byBeginEditing { value in
            print("✍️ begin:", value)
        }
        .byEndEditing { value in
            print("✅ end:", value)
        }
        .byAddTo(contentView) { [unowned self] make in
            make.top.equalTo(title1.snp.bottom).offset(8)
            make.left.equalToSuperview().offset(16)
            make.right.equalToSuperview().offset(-16)
            make.height.equalTo(100)
        }
}()
配合富文本
private lazy var tvRed: UITextView = {
    UITextView()
        .byAttributedText(NSMutableAttributedString(
            string: "🔴 自定义红色链接:",
            attributes: [.font: UIFont.systemFont(ofSize: 15),
                         .foregroundColor: UIColor.secondaryLabel]
        ).byAdd(NSAttributedString(
            string: " Jobs 官网",
            attributes: [.link: URL(string: "https://www.google.com")!,
                         .font: UIFont.boldSystemFont(ofSize: 16)]
        )).byAdd(NSAttributedString(
            string: "\n客服电话:400-123-4567",
            attributes: [.font: UIFont.systemFont(ofSize: 15)]
        )))
        .byEditable(false)
        .bySelectable(true)
        .byDataDetectorTypes([.link, .phoneNumber])
        .byLinkTextAttributes([
            .foregroundColor: UIColor.systemRed,
            .underlineStyle: NSUnderlineStyle.single.rawValue
        ])
        .byTextContainerInset(UIEdgeInsets(top: 8, left: 10, bottom: 8, right: 10))
        .byRoundedBorder(color: .systemGray4, width: 1, radius: 8)
        .byBeginEditing { value in
            print("✍️ begin:", value)
        }
        .byEndEditing { value in
            print("✅ end:", value)
        }
        .byAddTo(contentView) { [unowned self] make in
            make.top.equalTo(tvBlue.snp.bottom).offset(12)
            make.left.right.equalTo(tv1)
            make.height.equalTo(110)
        }
}()
2.6、对UITextField输入框的封装#
2.6.1、利用分类,对UITextField输入框的封装(含输入监控过滤)#
密码输入框
/// 密码输入框
private lazy var passwordTF: UITextField = {
    UITextField()
        .byPlaceholder("请输入密码(最长 5)")
        .byFont(.systemFont(ofSize: 16))
        .byTextColor(.label)
        .byKeyboardType(.default)
        .byReturnKeyType(.done)
        .byClearButtonMode(.whileEditing)
        .byDelegate(self)
        .byLeftView(UIView(frame: CGRect(x: 0, y: 0, width: 12, height: 1)))
        .byLeftViewMode(.always)
        .bySecureTextEntry(true)
        // MARK: Jobs 输入监听(无 Rx)—— 密码:最长 5,只做监听
        .byBeginEditing { value in
            print("✍️ password begin:", value)
        }
        .byOnInput(limit: 5) { [weak self] char, value, mode, isLimited in
            guard let self else { return }
            let current = self.passwordTF.text ?? value
            print("🔐 char='\(char)' value='\(current)' mode=\(mode) limited=\(isLimited)")
        }
        .byEndEditing { value in
            print("✅ password end:", value)
        }
        .byAddTo(view) { [unowned self] make in
            make.top.equalTo(emailTF.snp.bottom).offset(16)
            make.left.right.height.equalTo(emailTF)
        }
        .byBorderColor(.cyan)
        .byBorderWidth(0.5)
        .byMasksToBounds(YES)
        .byClipsToBounds(YES)
        .byCornerRadius(8.h)
}()
邮箱输入框
/// 邮箱输入框
private lazy var emailTF: UITextField = {
    UITextField()
        .byPlaceholder("请输入邮箱(去空格 / 最长 8)")
        .byFont(.systemFont(ofSize: 16))
        .byTextColor(.label)
        .byKeyboardType(.emailAddress)
        .byReturnKeyType(.next)
        .byClearButtonMode(.whileEditing)
        .byDelegate(self)
        .byLeftView(UIView(frame: CGRect(x: 0, y: 0, width: 12, height: 1)))
        .byLeftViewMode(.always)
        // MARK: Jobs 输入监听(无 Rx)—— 邮箱:去空格 + 最长 8 + 简单规则
        .byBeginEditing { value in
            print("✍️ email begin:", value)
        }
        .byOnInput(limit: 8) { [weak self] char, value, mode, isLimited in
            guard let self else { return }
            let trimmed = value.trimmingCharacters(in: .whitespaces)
            if trimmed != value {
                self.emailTF.text = trimmed
            }
            let current = self.emailTF.text ?? trimmed
            let ok = current.count >= 3 && current.contains("@")
            print("📧 char='\(char)' value='\(current)' mode=\(mode) limited=\(isLimited) ok=\(ok)")
        }
        .byEndEditing { value in
            print("✅ email end:", value)
        }
        .byAddTo(view) {[unowned self] make in
            make.left.equalToSuperview().offset(16)
            make.right.equalToSuperview().offset(-16)
            make.height.equalTo(44)
            if view.jobs_hasVisibleTopBar() {
                make.top.equalTo(self.gk_navigationBar.snp.bottom).offset(10)
            } else {
                make.top.equalTo(view.safeAreaLayoutGuide.snp.top)
            }
        }
        .byBorderColor(.cyan)
        .byBorderWidth(0.5)
        .byMasksToBounds(YES)
        .byClipsToBounds(YES)
        .byCornerRadius(8.h)
}()
2.6.2、利用继承,对UITextField输入框的封装 ➤ JobsTextField#
在
UITextField下面加了一个UImageView作为父视图,方便设置边距
private lazy var titleTF: JobsTextField = {
    JobsTextField()
        .byTextFieldConfig({ textField in
            textField
                .byPlaceholder("请输入内容(必填)")
                .byPlaceholderFont(.PingFangSC.Regular(14))
                .byPlaceholderColor("#BBBBBB".cor)
                .byFont(.PingFangSC.Regular(14))
                .byTextColor("#BBBBBB".cor)
                .byKeyboardType(.default)
                .byReturnKeyType(.next)
                .byClearButtonMode(.whileEditing)
                .byRightView(
                    UIView(frame: CGRect(x: 0, y: 0, width: 20, height: 20))
                        .byAddSubviewRetSuper(
                            UIButton.sys()
                                .bySize(CGSizeMake(20, 20))
                                /// 背景图片
                                .byBackgroundImage("删除".img, for: .normal)
                                /// 普通@点按事件触发
                                .onTap { [weak self] sender in
                                    guard let self else { return }
                                    sender.isSelected.toggle()
                                    titleTF.text = ""
                                }
                        )
                )
                .byRightViewMode(.whileEditing)
                /// 输入框由不活跃状态 ➤ 活跃状态 只调用一次
                .byBeginEditing { value in
                    self.titleTF.byBorderColor("#C33E2D".cor)
                        .byBorderWidth(0.5)
                        .byMasksToBounds(YES)
                    print("✍️ email begin:", value)
                }
                /// 效果@等于父系方法UIControl.byAddAction.editingChanged,只不过比父系方法先调用
                .byOnInput(limit: nil) { [weak self] char, value, mode, isLimited in
                    guard let self else { return }
                    self.buttonStatusToChange()
                }
                .byEndEditing { value in
                    print("✅ email end:", value)
                    self.titleTF.byBorderColor("#eaeaea".cor)
                }
        })
        .byInsetTop(14)
        .byInsetLeft(12)
        .byInsetRight(12)
        .byInsetBottom(14)
        .byAddTo(cardView) { [unowned self] make in
            make.top.equalTo(typeRowView.snp.bottom).offset(AD(0))
            make.leading.equalTo(cardView).offset(AD(16))
            make.trailing.equalTo(cardView).offset(AD(-16))
            make.height.equalTo(AD(44))
        }
        .byBorderColor("#eaeaea".cor)
        .byBorderWidth(0.5)
        .byMasksToBounds(YES)
        .byClipsToBounds(YES)
        .byCornerRadius(4.h)
}()2.7、对UIImageView的封装(暂时只展示Kingfisher ,当然 **SDWebImage **也有)#
UIImageView@字符串本地图/// UIImageView@字符串本地图 private lazy var localImgView: UIImageView = { UIImageView() .byImage("Ani".img) .byContentMode(.scaleAspectFill) .byClipsToBounds() .onTap { iv in toastBy("单击图片:\(iv)") } .onLongPress(minDuration: 0.8, movement: 12, touches: 1, name: "customLongPress") { iv, gr in switch gr.state { case .began: toastBy("长按开始 on \(iv)") case .ended, .cancelled, .failed: toastBy("长按结束 on \(iv)") default: break } } .byAddTo(scrollView) { [unowned self] make in make.top.equalTo(scrollView.contentLayoutGuide.snp.top).offset(10.h) make.left.equalTo(scrollView.frameLayoutGuide.snp.left).offset(20.w) make.right.equalTo(scrollView.frameLayoutGuide.snp.right).inset(20.w) make.height.equalTo(180.h) } }()UIImageView字符串网络图@Kingfisher/// UIImageView字符串网络图@Kingfisher private lazy var asyncImgView: UIImageView = { UIImageView() .byAsyncImageKF("https://picsum.photos/200/300", fallback: "唐老鸭".img) .byContentMode(.scaleAspectFill) .byClipsToBounds() .onTap { iv in toastBy("单击图片:\(iv)") } .onLongPress(minDuration: 0.8, movement: 12, touches: 1, name: "customLongPress") { iv, gr in switch gr.state { case .began: toastBy("长按开始 on \(iv)") case .ended, .cancelled, .failed: toastBy("长按结束 on \(iv)") default: break } } .byAddTo(scrollView) { [unowned self] make in make.top.equalTo(localImgView.snp.bottom).offset(20.h) make.left.equalTo(scrollView.frameLayoutGuide.snp.left).offset(20.w) make.right.equalTo(scrollView.frameLayoutGuide.snp.right).inset(20.w) make.height.equalTo(180.h) } }()UIImageView网络图(失败兜底图)@Kingfisher/// UIImageView网络图(失败兜底图)@Kingfisher private lazy var wrapperImgView: UIImageView = { UIImageView() .byContentMode(.scaleAspectFill) .byClipsToBounds() .kf_setImage("https://picsum.photos/200", placeholder: "Ani".img) .onTap { iv in toastBy("单击图片:\(iv)") } .onLongPress(minDuration: 0.8, movement: 12, touches: 1, name: "customLongPress") { iv, gr in switch gr.state { case .began: toastBy("长按开始 on \(iv)") case .ended, .cancelled, .failed: toastBy("长按结束 on \(iv)") default: break } } .byAddTo(scrollView) { [unowned self] make in make.top.equalTo(asyncImgViewSD.snp.bottom).offset(20.h) make.left.equalTo(scrollView.frameLayoutGuide.snp.left).offset(20.w) make.right.equalTo(scrollView.frameLayoutGuide.snp.right).inset(20.w) make.height.equalTo(180.h) } }()
2.8、对UICollectionView的封装#
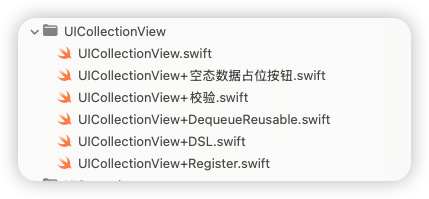
- 没数据时,自动显示空态图(是一个按钮)
- 封装了拉新/刷新 功能 ➤ 基于JobsRefresher
private lazy var flowLayout: UICollectionViewFlowLayout = {
    UICollectionViewFlowLayout()
        .byScrollDirection(.vertical)
        .byMinimumLineSpacing(10)
        .byMinimumInteritemSpacing(10)
        .bySectionInset(UIEdgeInsets(top: 10, left: 12, bottom: 10, right: 12))
}()

private lazy var collectionView: UICollectionView = {
    UICollectionView(frame: .zero, collectionViewLayout: flowLayout)
        .byDataSource(self)
        .byDelegate(self)
        .byRegisterCell(UICollectionViewCell.self)
        .byBackgroundView(nil)
        .byDragInteractionEnabled(false)
        .byContentInsetTop(8)
        .byExpandVerticalScrollDistance(200.h)
        // 非正式协议闭包化
        .byTarget(self)
        .numberOfItemsInSection { [weak self] (obj: AnyObject, cv: UICollectionView, section: Int) -> Int in
            self?.hItems ?? 0
        }
        .cellForItemAt { _, cv, indexPath in
            cv
                .dequeueCell(HCell.self, for: indexPath)
                .byData(indexPath.item)
                .onResult { _ in }
        }
        .didSelectItemAt({ obj, cv, idx in
            cv.deselectItem(at: idx, animated: true)
            print("点选逻辑")
        })
        // 空态按钮
        .byEmptyButtonProvider { [unowned self] in
            UIButton.sys()
                .byTitle("暂无数据", for: .normal)
                .bySubTitle("点我填充示例数据", for: .normal)
                .byImage(UIImage(systemName: "square.grid.2x2"), for: .normal)
                .byImagePlacement(.top)
                .onTap { [weak self] _ in
                    guard let self else { return }
                    self.items = (1...12).map { "Item \($0)" }
                    self.collectionView.byReloadData()        // ✅ reload 后自动评估空态
                }
                // 可选:自定义空态按钮布局
                .byEmptyLayout { btn, make, host in
                    make.centerX.equalTo(host)
                    make.centerY.equalTo(host).offset(-40)
                    make.leading.greaterThanOrEqualTo(host).offset(16)
                    make.trailing.lessThanOrEqualTo(host).inset(16)
                    make.width.lessThanOrEqualTo(host).multipliedBy(0.9)
                }
        }
        .byAddTo(view) { [unowned self] make in
            if view.jobs_hasVisibleTopBar() {
                make.top.equalTo(self.gk_navigationBar.snp.bottom).offset(10)
                make.left.right.bottom.equalToSuperview()
            } else {
                make.edges.equalToSuperview()
            }
        }
//        .showRefreshHeaderInfo(NO)   // 竖向Header + 横向Left
//        .showRefreshFooterInfo(YES)  // 竖向Footer + 横向Right
        .setLeftLottie(.custom(.init(animationName: "9squares_AlBoardman")))
        .setRightLottie(.inherit)     // 继承全局(没有全局就回退菊花)
        .enableRefreshHaptics(true)
        .setRefreshSound("Sound.wav")
        // 下拉刷新
        .byRefreshHeader(component: JobsDefaultHeader(),
                         container: self,
                         trigger: 66) { [weak self] in
            guard let self else { return }
            jobsRunOnMain(self) { vc in
                self.items = self.makeMockItems(count: 12)
                self.collectionView.byReloadData()
                self.collectionView.switchRefreshHeader(to: .normal)
                self.collectionView.switchRefreshFooter(to: .normal)
            }
        }
        // 上拉加载
        .byRefreshFooter(component: JobsDefaultFooter(),
                         container: self,
                         trigger: 66) { [weak self] in
            guard let self else { return }
            jobsRunOnMain(self) { vc in
                if self.items.count < 60 {
                    self.items.append(contentsOf: self.makeMockItems(count: 12, startAt: self.items.count + 1))
                    self.collectionView.byReloadData()
                    self.collectionView.switchRefreshFooter(to: .normal)
                } else {
                    self.collectionView.switchRefreshFooter(to: .noMoreData)
                }
            }
        }
        // 左侧拉:比如“上一页/回退”
        .configSideRefresh(with: JobsDefaultLeftRefresher(),
                           container: self,
                           at: .left,
                           trigger: 70) { [weak self] in
            guard let self else { return }
            jobsRunOnMain(self) { vc in
                try? await Task.sleep(nanoseconds: 900_000_000)
                // 模拟“刷新完成”:减少一个 item 并刷新
                self.hItems = max(8, self.hItems - 1)
                self.collectionView.byReloadData()
                self.collectionView.switchSideRefresh(.left, to: .normal)
            }
       }
       // 右侧拉:比如“下一页/加载更多卡片”
       .configSideRefresh(with: JobsDefaultRightRefresher(),
                          container: self,
                          at: .right,
                          trigger: 70) { [weak self] in
           guard let self else { return }
           jobsRunOnMain(self) { vc in
               try? await Task.sleep(nanoseconds: 900_000_000)
               self.hItems += 3
               self.collectionView.byReloadData()
               self.collectionView.switchSideRefresh(.right, to: .normal)
           }
       }
      .setHeaderLottie(.custom(.init(animationName: "LottieLogo1")))
      .setFooterLottie(.disabled) // 强制 footer 回退菊花(即使全局配置了)
      .enableRefreshHaptics(true)
      .setRefreshSound("Sound.wav")
}()
/// UICollectionViewDataSource
func numberOfSections(in collectionView: UICollectionView) -> Int { 1 }
func collectionView(_ collectionView: UICollectionView, numberOfItemsInSection section: Int) -> Int {
items.count
}
func collectionView(_ collectionView: UICollectionView,
cellForItemAt indexPath: IndexPath) -> UICollectionViewCell {
let cell: UICollectionViewCell = collectionView.byDequeueCell(UICollectionViewCell.self, for: indexPath)
let label: UILabel
if let exist = cell.contentView.viewWithTag(1001) as? UILabel {
label = exist
} else {
label = UILabel()
.byNumberOfLines(1)
.byTextAlignment(.center)
.byFont(.systemFont(ofSize: 16, weight: .medium))
.byTextColor(.label)
.byTag(1001)
.byAddTo(cell.contentView) { make in // ✅ 加到 contentView
make.edges.equalToSuperview().inset(8)
}
// 背景 & 圆角(只需设一次)
cell.contentView.byBgColor(.secondarySystemBackground)
.byCornerRadius(10)
.byMasksToBounds(true)
}
label.text = items[indexPath.item]
return cell
}/// UICollectionViewDelegate
func collectionView(_ collectionView: UICollectionView, didSelectItemAt indexPath: IndexPath) {
print("✅ didSelect Item: \(indexPath.item)")
collectionView.deselectItem(at: indexPath, animated: true)
}/// UICollectionViewDelegateFlowLayout
func collectionView(_ collectionView: UICollectionView,
layout collectionViewLayout: UICollectionViewLayout,
sizeForItemAt indexPath: IndexPath) -> CGSize {
// 计算 2 列卡片宽度(考虑 sectionInset / interItemSpacing)
guard let layout = collectionViewLayout as? UICollectionViewFlowLayout else {
return CGSize(width: 100, height: 60)
}
let inset = layout.sectionInset
let spacing = layout.minimumInteritemSpacing
let columns: CGFloat = 2
let totalH = inset.left + inset.right + (columns - 1) * spacing
let w = floor((collectionView.bounds.width - totalH) / columns)
return CGSize(width: w, height: 64)
}2.9、对UITableView的封装#
- 没数据时,自动显示空态图(是一个按钮)
- 封装了拉新/刷新 功能 ➤ 基于JobsRefresher
private lazy var tableView: UITableView = {
    UITableView(frame: .zero, style: .insetGrouped)
        .byDataSource(self)
        .byDelegate(self)
        .byRegisterCell(UITableViewCell.self)
        .byNoContentInsetAdjustment()
        .bySeparatorStyle(.singleLine)
        .byNoSectionHeaderTopPadding()
        .byContentInsetTop(8)
        .byExpandVerticalScrollDistance(200.h)
        .byTableHeaderView(
          UIView()
              .byHeight(65)
              .byBackgroundColor(.clear)
        )
        // 非正式协议闭包化
        .byTarget(self)
        .numberOfRowsInSection { [weak self] (obj: AnyObject, tv: UITableView, section: Int) -> Int in
            self?.rows ?? 0
        }
        .cellForRowAt { _, tv, indexPath in
            let c = tv.dequeueReusableCell(withIdentifier: "cell") ??
                    UITableViewCell(style: .default, reuseIdentifier: "cell")
            var cfg = c.defaultContentConfiguration()
            cfg.text = "Row \(indexPath.row)"
            c.contentConfiguration = cfg
            return c
        }
        .didSelectRowAt { _, tv, indexPath in
            tv.deselectRow(at: indexPath, animated: true)
            print("点选逻辑")
        }
         // 空态按钮
        .byEmptyButtonProvider { [unowned self] in
            UIButton(type: .system)
                .byTitle("暂无数据", for: .normal)
                .bySubTitle("点我填充示例数据", for: .normal)
                .byImage("tray".sysImg, for: .normal)
                .byImagePlacement(.top)
                .onTap { [weak self] _ in
                    guard let self else { return }
                    self.items = (1...10).map { "Row \($0)" }
                    self.tableView.reloadData()   // ✅ reload 后会自动评估空态,无需你再手动调用
                }
                // 可选:不满意默认居中 -> 自定义布局
                .byEmptyLayout { btn, make, host in
                    make.centerX.equalTo(host)
                    make.centerY.equalTo(host).offset(-40)
                    make.leading.greaterThanOrEqualTo(host).offset(16)
                    make.trailing.lessThanOrEqualTo(host).inset(16)
                    make.width.lessThanOrEqualTo(host).multipliedBy(0.9)
                }
        }
//            .byContentInset(UIEdgeInsets(
//                top: UIApplication.jobsSafeTopInset + 30,
//                left: 0,
//                bottom: 0,
//                right: 0
//            ))
        // 下拉刷新 Header
        .byRefreshHeader(component: JobsDefaultHeader(),
                         container: self,
                         trigger: 66) { [weak self] in
            guard let self else { return }
            jobsRunOnMain {
                self.tableView.byReloadData()
                self.tableView.switchRefreshHeader(to: .normal)
                self.tableView.switchRefreshFooter(to: .normal) // 复位“无更多”
            }
        }
        // 上拉加载 Footer
        .byRefreshFooter(component: JobsDefaultFooter(),
                         container: self,
                         trigger: 66) { [weak self] in
            guard let self else { return }
            jobsRunOnMain {
                self.tableView.switchRefreshFooter(to: .noMoreData)
            }
        }
        .byAddTo(view) {[unowned self] make in
            if view.jobs_hasVisibleTopBar() {
                make.top.equalTo(self.gk_navigationBar.snp.bottom).offset(10)
                make.left.right.bottom.equalToSuperview()
            } else {
                make.edges.equalToSuperview()
            }
        }
//        .showRefreshHeaderInfo(NO)   // 竖向Header + 横向Left
//        .showRefreshFooterInfo(YES)  // 竖向Footer + 横向Right
        .setLeftLottie(.custom(.init(animationName: "9squares_AlBoardman")))
        .setRightLottie(.inherit)     // 继承全局(没有全局就回退菊花)
        // 左侧拉:比如“上一页/回退”
        .configSideRefresh(with: JobsDefaultLeftRefresher(),
                           container: self,
                           at: .left,
                           trigger: 70) { [weak self] in
            guard let self else { return }
            jobsRunOnMain(self) { vc in
                try? await Task.sleep(nanoseconds: 900_000_000)
                // 模拟“刷新完成”:减少一个 item 并刷新
                self.hItems = max(8, self.hItems - 1)
                self.collectionView.byReloadData()
                self.collectionView.switchSideRefresh(.left, to: .normal)
            }
       }
       // 右侧拉:比如“下一页/加载更多卡片”
       .configSideRefresh(with: JobsDefaultRightRefresher(),
                          container: self,
                          at: .right,
                          trigger: 70) { [weak self] in
           guard let self else { return }
           jobsRunOnMain(self) { vc in
               try? await Task.sleep(nanoseconds: 900_000_000)
               self.hItems += 3
               self.collectionView.byReloadData()
               self.collectionView.switchSideRefresh(.right, to: .normal)
           }
       }
      .setHeaderLottie(.custom(.init(animationName: "LottieLogo1")))
      .setFooterLottie(.disabled) // 强制 footer 回退菊花(即使全局配置了)
      .enableRefreshHaptics(true)
      .setRefreshSound("Sound.wav")
}()
extension BMPlayerDemoVC : UITableViewDataSource,UITableViewDelegate{
func tableView(_ tableView: UITableView, numberOfRowsInSection section: Int) -> Int { Row.allCases.count }
func tableView(_ tableView: UITableView, cellForRowAt indexPath: IndexPath) -> UITableViewCell {
tableView.byDequeueReusableCell(withType: UITableViewCell.self, for: indexPath)
.byData(data[indexPath.row])
.byText(Row(rawValue: indexPath.row)?.title)
.byAccessoryType(.disclosureIndicator)
}
func tableView(_ tableView: UITableView, heightForRowAt indexPath: IndexPath) -> CGFloat { 64 }
func tableView(_ tableView: UITableView, didSelectRowAt indexPath: IndexPath) {
tableView.deselectRow(at: indexPath, animated: true)
switch Row(rawValue: indexPath.row)! {
case .local: PlayerLocalVC().byPush(self)
case .remote: PlayerRemoteVC().byPush(self)
case .feed: FeedListVC().byPush(self)
case .float: JobsLiveFloatPlayer.shared.showRemoteLive()
}
}
}2.10、对UILabel的封装#
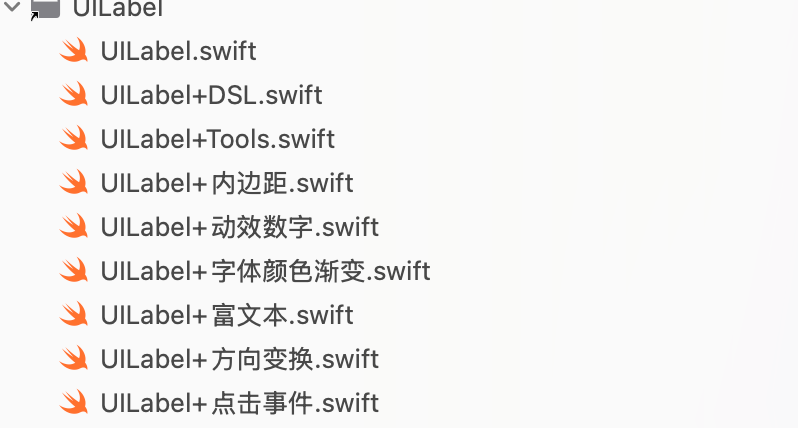
2.10.1、动效数字标签(内核基于JobsSwiftTimer)#
private lazy var valueLabel: UILabel = {
    UILabel()
        .byTextAlignment(.center)
        .byFont(.systemFont(ofSize: 52, weight: .bold))
        .byTextColor(.label)
        .byText("\(Int(defaultStart))")
        .byNumberOfLines(1)
        /// 配置@数字动效
        .byAnimatedTextNumber(duration: 0.9, minimumInterval: 1.0 / 60.0)
        .byAddTo(cardView) { [unowned self] make in
            make.top.equalToSuperview().offset(24)
            make.left.equalToSuperview().offset(self.cardInset)
            make.right.equalToSuperview().inset(self.cardInset)
        }
}()
/// 启动@数字动效
self.valueLabel
.byStopAnimatedTextNumber()
.byAnimatedTextNumber(
start: startValue,
step: nil,
duration: 0.9,
minimumInterval: 1.0 / 60.0,
completion: nil
)
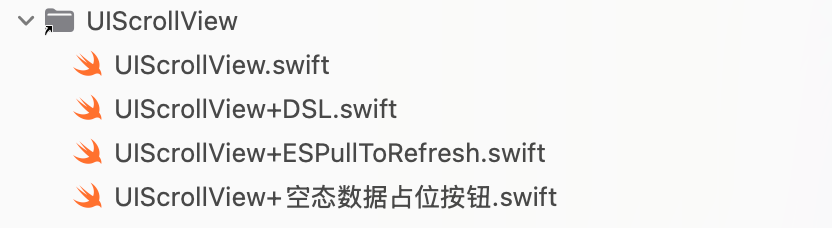
.byStartAnimatedTextNumber(endText)2.11、对UIScrollView的封装#
2.12、对UIAlertController的封装#
最简单的 Alert
private lazy var simpleAlert: UIAlertController = {
    UIAlertController
        .makeAlert("提示", "这是一条简单提示")
        .byAddCancel { [weak self] _ in
            guard let self else { return }
            print("Cancel")
            // TODO: 这里写你的取消逻辑
        }
        .byAddOK { [weak self] _ in
            guard let self else { return }
            print("OK")
            // TODO: 这里写你的确认逻辑
        }
}()
private lazy var simpleAlert: UIAlertController = { UIAlertController .makeAlert("重命名", "请输入新的名称") // .bySDBgImageView("https://picsum.photos/800/600", // image: "唐老鸭".img, // hideSystemBackdrop: true) // .byKFBgImageView("https://picsum.photos/800/600", // image: "唐老鸭".img, // hideSystemBackdrop: true) .byBgImage("唐老鸭".img) // 本地图背景(同步阶段,无动画) .byCardBorder(width: 1, color: .systemBlue) // 外层卡片描边 .byAddTextField(placeholder: "新名称", borderWidth: nil, // ← 不给 tf 自身描边 borderColor: nil, cornerRadius: 8) { alert, tf, input, oldText, isDeleting in let ok = alert.actions.first { $0.title == "确定" } ok?.isEnabled = !(tf.text ?? "").trimmingCharacters(in: .whitespacesAndNewlines).isEmpty } .byTextFieldOuterBorder(at: 0, width: 1, color: .systemBlue, cornerRadius: 10, insets: .init(top: 6, left: 12, bottom: 6, right: 12)) // ← 给灰色容器描边 .byAddCancel { _ in // ✅ 一个回调(只给 action) print("Cancel tapped") } .byAddOK{ alert, _ in // 需要 alert + action 的回调 let name = alert.textField(at: 0)?.text ?? "" print("new name =", name) } .byTintColor(.systemBlue) .byPresent(self) }()private lazy var simpleAlert: UIAlertController = { UIAlertController .makeActionSheet("选择来源", nil) .byAddAction(title: "相机") { _ in print("camera") } .byAddAction(title: "相册") { _ in print("photos") } .byAddCancel { _ in print("Cancel tapped") } .byPresent(self) }()private lazy var simpleAlert: UIAlertController = { UIAlertController .makeActionSheet("操作", nil) .byAddDestructive("删除") { _ in print("delete") } .byAddCancel { _ in print("Cancel tapped") } .byPresent(self, anchor: .view(sender, sender.bounds)) // 指定锚点 }()
2.13、对WebView的封装#
registerMobileAction后的名字即为和前端联调对准的方法名private lazy var web: BaseWebView = { [unowned self] in return BaseWebView() .byBgColor(.clear) .byAllowedHosts([]) // 不限域 .byOpenBlankInPlace(true) .byDisableSelectionAndCallout(false) .byUserAgentSuffixProvider { _ in // 按请求动态追加 UA 后缀;nil = 使用系统默认 UA。 // 需要区分页面时在此 return "YourApp/1.0" return nil } // .byNormalizeMToWWW(false) // ❗️关闭 m→www // .byForceHTTPSUpgrade(false) // ❗️关闭 http→https // .bySafariFallbackOnHTTP(false) // ❗️关闭 Safari 兜底 // .byInjectRedirectSanitizerJS(false) // 可关,避免干涉 H5 自己跳转 /// URL 重写策略(默认不重写;这里保持关闭) .byURLRewriter { _ in // 例如要做 http→https 升级:检测 url.scheme == "http" 再返回新 URL // 现在返回 nil 表示不改写 return nil } /// Safari 兜底(默认不开);返回 true 即交给 Safari 打开 .bySafariFallbackRule { _ in return false } /// 一键开导航栏(默认标题=webView.title,默认有返回键) .byNavBarEnabled(true) .byNavBarStyle { s in s.byHairlineHidden(false) .byBackgroundColor(.systemBackground) .byTitleAlignmentCenter(true) } /// 自定义返回键(想隐藏就:.byNavBarBackButtonProvider { nil }) .byNavBarBackButtonProvider { UIButton(type: .system) .byBackgroundColor(.clear) .byImage(UIImage(systemName: "chevron.left"), for: .normal) .byTitle("返回", for: .normal) .byTitleFont(.systemFont(ofSize: 16, weight: .medium)) .byTitleColor(.label, for: .normal) .byContentEdgeInsets(.init(top: 6, left: 10, bottom: 6, right: 10)) .byTapSound("Sound.wav") } /// 返回行为:优先后退,否则关闭当前控制器 .byNavBarOnBack { [weak self] in guard let self else { return } closeByResult("") } .byAddTo(view) { [unowned self] make in make.edges.equalToSuperview() } /// 以下是依据前端暴露的自定义方法进行的JS交互 .registerMobileAction("navigateToHome") { [weak self] body, reply in /// 跳转到首页 self!.closeByResult("") reply(nil) } .registerMobileAction("getToken") { [weak self] body, reply in reply(nil) } .registerMobileAction("navigateToSecurityCenter") { [weak self] body, reply in /// 跳转福利中心 reply(nil) } .registerMobileAction("navigateToLogin") { [weak self] body, reply in /// 跳转到登录页 reply(nil) } .registerMobileAction("navigateToDeposit") { [weak self] body, reply in /// 跳转到充值页 reply(nil) } .registerMobileAction("closeWebView") { [weak self] body, reply in /// 关闭WebView reply(nil) } .registerMobileAction("showToast") { [weak self] body, reply in /// 显示Toast JobsToast.show( text: body.stringValue(for: "message") ?? "", config: JobsToast.Config() .byBgColor(.systemGreen.withAlphaComponent(0.9)) .byCornerRadius(12) ) reply(nil) } }()一般的WKWebView,只关心一般的显示,不做过多的交互处理
import WebKit

private lazy var webView: WKWebView = {
    WKWebView(frame: .zero, configuration: WKWebViewConfiguration()
        .byWebsiteDataStore(.default())
        .byAllowsInlineMediaPlayback(true)
        .byUserContentController(WKUserContentController().byAddUserScript(Self.makeBridgeUserScript()))
        .byDefaultWebpagePreferences { wp in
            wp.allowsContentJavaScript = true
        }
    )
    .byAddTo(view) { [unowned self] make in
        make.top.equalTo(textField.snp.bottom).offset(12)
        make.centerX.equalToSuperview()
        make.height.equalTo(36)
    }
}()
2.14、带箭头的对话框#
UIView().byDialogBoxContent { dialogBoxView in
    UITextView()
        .byBackgroundColor(.clear)
        .byText(
            "1.电话、QQ、微信号、乱码、全数字皆、不雅字眼、辱骂 词汇带、负面情绪字眼、标点符号皆会审核失败"
                .add("\n")
                .add("2. 中文字母8个为限、全英文字母或全拼音、中文字母或拼 音加数字、字母数字最多2个、超过、一律拒绝")
                .add("\n")
                .add("3. 昵称30日内仅能更改一次")
        )
        .byTextColor(.white)
        .byFont(.systemFont(ofSize: 16))
        .byEditable(NO)
        .byAddTo(dialogBoxView) { [unowned self] make in
            make.edges.equalToSuperview()
        }
}2.15、对计时器的封装JobsSwiftTimer#
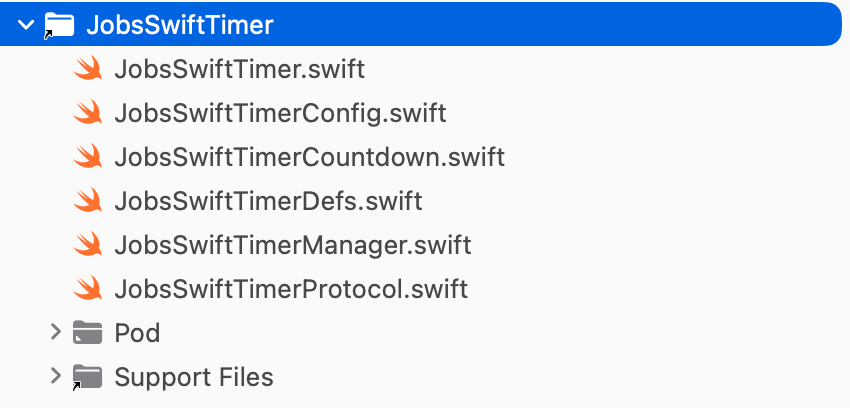
统一协议
// MARK: - 统一协议
public protocol JobsSwiftTimerProtocol: AnyObject {
    /// 计时器当前是否处于运行中
    var isRunning: Bool { get }
    /// 启动计时器
    @discardableResult
    func start() -> Self
    /// 暂停计时器
    @discardableResult
    func pause() -> Self
    /// 恢复计时器
    @discardableResult
    func resume() -> Self
    /// 停止计时器(销毁@有回调)
    @discardableResult
    func fireOnce() -> Self
    /// 停止计时器(销毁@无回调)
    @discardableResult
    func stop() -> Self
    /// 注册回调(每 tick 执行一次)
    @discardableResult
    func onTick(_ block: @escaping JobsTimerCallback) -> Self
    /// 注册完成回调(用于一次性定时器或倒计时)
    @discardableResult
    func onFinish(_ block: @escaping JobsTimerCallback) -> Self
}
// MARK: - 标识协议(建议用于 Manager ID 管理)
public protocol JobsSwiftTimerIdentifiable {
    var identifier: String? { get }
}
使用
import JobsSwiftTimer let t = JobsTimer(kind: kind, config: config) { [weak self] in guard let self else { return } guard self.state == .running else { return } guard let start = self.startDate else { return } /// TODO } timer?.stop() timer = t t.start()iOS系统中存在三大计时器核心,分别是:NSTimer / GCD / CADisplayLink。其间的差异在于精确粒度的区别,在大多数场景下都无差别,除非在特定场景下才会有分别
在敏捷开发的基础下,我们只需要关心业务层,而不善于关心创建流程(期望快速一键创建),而偏偏系统的创建流程较为复杂。其难点在于计时器的销毁在不经意之间可能会引起循环引用问题,造成页面的不释放,导致内存泄露或者进数据异常
如果是面向业务开发,程序员其实最关心的,是计时器向外抛出的4~5种状态(用协议的方式对外暴露)。分别是:(结束有2种形态,其中一种结束时需要执行一段操作)
- 启动计时器
func start() - 暂停计时器
func pause() - 恢复计时器
func resume() - 停止计时器(销毁@有回调)
func fireOnce() - 停止计时器(销毁@无回调)
func stop()
- 启动计时器
相较于YYKit带的计时器
- YYTimer是一个纯Objc的库
- YYTimer只是一个计时器的最佳实践:多种定时器组合出来的一个计时器模块
- 我个人认为还是需要把使用方式暴露给用户,让用户自己去定义
- 使用何种计时器核心
- 步频
- 事件回调(运行中、结束那一刻)
- 是否是正计时/是否是倒计时
- 。。。
2.15.1、倒计时按钮#
创建方案一
import JobsByUIKit

private lazy var startButton: UIButton = {
    UIButton(type: .system)
        .byTitle("开始", for: .normal)
        .byTitleFont(.systemFont(ofSize: 22, weight: .bold))
        .byTitleColor(.white, for: .normal)
        .byBackgroundColor(.systemBlue, for: .normal)
        .byCornerRadius(10)
        .byMasksToBounds(true)
        // 每 tick:更新时间 & 最近触发时间
        .onCountdownTick({ button, remain, total, kind in
            /// TODO
        })
        // 状态变化:驱动控制键(暂停/继续/Fire/停止)的可用与配色
        .onTimerStateChange({ [weak self] button, old, new in
            guard let self else { return }
            /// TODO
        })
        // 点击开始:不传 total => 正计时
        .onTap { [weak self] btn in
            guard let self else { return }
            /// 正/倒计时配置
            guard isCountdownTime else {
                btn.startTimer(
                    total: 60,// ❤️ 这里的参数如果不传(nil) => 则为正计时
                    interval: 1,
                    kind: nil) { [weak self] btn in
                        guard let self else { return }
                        isCountdownTime = YES
                                        /// TODO
                    };return
            }
        }
        .byAddTo(view) { [unowned self] make in
            /// TODO
        }
}()
创建方案二
import JobsCountdownButton

private lazy var countdownButton: UIButton = {
    UIButton()
        /// 倒计时按钮核心配置
        .byCountdown { cfg in
            cfg.mode = .down(from: 12)
            cfg.clickableWhileRunning = true
            cfg.onTapWhileRunning = { btn, _ in
                "运行中被点击!".toast
            }
            cfg.renderConfiguration = { sec, base in
                var c = base
                c.title = "可点 \(sec)s"
                return c
            }
        }
        /// 把「点击按钮」和「启动倒计时」自动绑定起来
        //.byCountdownOnTapAuto()
        .onTap { [weak self] sender in
            guard let self = self,
                  let ctrl = sender.jobsCountdownController
            else { return }

            if ctrl.isRunning {
                // 正在跑
                if ctrl.config.clickableWhileRunning {
                    ctrl.config.onTapWhileRunning?(sender, ctrl.config)
                } else {
                    // 不可点就直接吞掉点击
                }
            } else {
                // 未运行 -> 开始
                ctrl.start()
            }
        }

        .byAddTo(self) { [unowned self] make in
            /// TODO
        }
        .byBorderColor(.cyan)
        .byBorderWidth(0.5)
        .byMasksToBounds(YES)
        .byClipsToBounds(YES)
        /// 切角@平面四个角全切
        .byCornerRadius(8.h)
        /// 切角@切固定角,iOS11及其以后可用。需要再配合layer.cornerRadius以生效
        .byMaskedCorners([.layerMinXMinYCorner, .layerMaxXMinYCorner])
        /// 切角@切固定角,兼容旧版本iOS系统
        .byCornerRaduis(corner: [.bottomLeft, .bottomRight], raduis: 4)
}()
2.15.2、跑马灯(实际展现的控件是按钮)#
// MARK: - 1. 向上连续滚动
private lazy var upContinuousMarquee: JobsMarqueeView = { [unowned self] in
        JobsMarqueeView()
            .byDirection(.up)
            .byScrollMode(.continuous(speed: 40))
            .byItemSizeMode(.fitContent)   // 典型公告跑马灯
            .byDataSourceButtons([
                UIButton.sys()
                    .byBackgroundColor(.systemYellow.withAlphaComponent(0.2), for: .normal)
                    .byTitle("向上连续 · 公告 1", for: .normal)
                    .byTitleColor(.label, for: .normal)
                    .byTitleFont(.systemFont(ofSize: 14, weight: .medium))
                    .bySubTitle("更多内容 1", for: .normal)
                    .bySubTitleColor(.secondaryLabel, for: .normal)
                    .bySubTitleFont(.systemFont(ofSize: 11, weight: .regular))
                    .byImage("megaphone.fill".sysImg, for: .normal)
                    .byContentEdgeInsets(UIEdgeInsets(top: 4, left: 8, bottom: 4, right: 8))
                    .byTitleEdgeInsets(UIEdgeInsets(top: 0, left: 6, bottom: 0, right: -6))
                    .byTapSound("Sound.wav")
                    .onTap { sender in
                        print("🔔 向上连续 · 公告 1 tapped, selected=\(sender.isSelected)")
                        sender.title?.toast
                    }
                    .onLongPress(minimumPressDuration: 0.8) { btn, gr in
                        if gr.state == .began {
                            btn.alpha = 0.6
                            print("长按开始 on \(btn)")
                        } else if gr.state == .ended || gr.state == .cancelled {
                            btn.alpha = 1.0
                            print("长按结束")
                        }
                    },
                UIButton.sys()
                    .byBackgroundColor(.systemYellow.withAlphaComponent(0.2), for: .normal)
                    .byTitle("向上连续 · 公告 2", for: .normal)
                    .byTitleColor(.label, for: .normal)
                    .byTitleFont(.systemFont(ofSize: 14, weight: .medium))
                    .bySubTitle("更多内容 2", for: .normal)
                    .bySubTitleColor(.secondaryLabel, for: .normal)
                    .bySubTitleFont(.systemFont(ofSize: 11, weight: .regular))
                    .byImage("megaphone.fill".sysImg, for: .normal)
                    .byContentEdgeInsets(UIEdgeInsets(top: 4, left: 8, bottom: 4, right: 8))
                    .byTitleEdgeInsets(UIEdgeInsets(top: 0, left: 6, bottom: 0, right: -6))
                    .byTapSound("Sound.wav")
                    .onTap { sender in
                        print("🔔 向上连续 · 公告 2 tapped, selected=\(sender.isSelected)")
                        sender.title?.toast
                    }
                    .onLongPress(minimumPressDuration: 0.8) { btn, gr in
                        if gr.state == .began {
                            btn.alpha = 0.6
                            print("长按开始 on \(btn)")
                        } else if gr.state == .ended || gr.state == .cancelled {
                            btn.alpha = 1.0
                            print("长按结束")
                        }
                    },
                UIButton.sys()
                    .byBackgroundColor(.systemYellow.withAlphaComponent(0.2), for: .normal)
                    .byTitle("向上连续 · 公告 3", for: .normal)
                    .byTitleColor(.label, for: .normal)
                    .byTitleFont(.systemFont(ofSize: 14, weight: .medium))
                    .bySubTitle("更多内容 3", for: .normal)
                    .bySubTitleColor(.secondaryLabel, for: .normal)
                    .bySubTitleFont(.systemFont(ofSize: 11, weight: .regular))
                    .byImage("megaphone.fill".sysImg, for: .normal)
                    .byContentEdgeInsets(UIEdgeInsets(top: 4, left: 8, bottom: 4, right: 8))
                    .byTitleEdgeInsets(UIEdgeInsets(top: 0, left: 6, bottom: 0, right: -6))
                    .byTapSound("Sound.wav")
                    .onTap { sender in
                        print("🔔 向上连续 · 公告 3 tapped, selected=\(sender.isSelected)")
                        sender.title?.toast
                    }
                    .onLongPress(minimumPressDuration: 0.8) { btn, gr in
                        if gr.state == .began {
                            btn.alpha = 0.6
                            print("长按开始 on \(btn)")
                        } else if gr.state == .ended || gr.state == .cancelled {
                            btn.alpha = 1.0
                            print("长按结束")
                        }
                    }
            ])
            .byBgColor(.randomColor)
            .byAddTo(self.scrollView) { [unowned self] make in
                if #available(iOS 11.0, *) {
                    make.top.equalTo(self.scrollView.contentLayoutGuide.snp.top).offset(10)
                    make.left.equalTo(self.scrollView.frameLayoutGuide.snp.left).offset(self.horizontalInset)
                    make.right.equalTo(self.scrollView.frameLayoutGuide.snp.right).inset(self.horizontalInset)
                } else {
                    make.top.equalTo(self.scrollView.snp.top).offset(10)
                    make.left.equalTo(self.scrollView).offset(self.horizontalInset)
                    make.right.equalTo(self.scrollView).inset(self.horizontalInset)
                }
                make.height.equalTo(self.marqueeHeight)
            }
}()2.15.3、轮播图(实际展现的控件是按钮)#
// MARK: - 13. Kingfisher@背景图
private lazy var kingfisherImageButtonsMarquee: JobsMarqueeView = { [unowned self] in
    JobsMarqueeView()
        .byDirection(.left)
        .byScrollMode(.frequency(interval: 1.0))
        .byItemSizeMode(.fillBounds)
        .byDataSourceButtons ([
            UIButton.sys()
                .byTitle("我是UIButton主标题@Kingfisher").byTitleColor(.red)
                .bySubTitle("我是UIButton副标题@Kingfisher").bySubTitleColor(.yellow)
                .kf_imageURL("https://picsum.photos/" + ScreenWidth().toString(0) + "/" + self.marqueeHeight.toString(0))
                .kf_placeholderImage("唐老鸭".img)
                .kf_options([
                    .processor(DownsamplingImageProcessor(size: CGSize(width: 500, height: 200))),
                    .scaleFactor(UIScreen.main.scale),
                    .cacheOriginalImage,
                    .transition(.fade(0.25)),
                    .retryStrategy(DelayRetryStrategy(maxRetryCount: 2, retryInterval: .seconds(1)))
                ])
                .kf_bgNormalLoad()// 之前是配置项,这里才是真正决定渲染背景图/前景图
                .byTapSound("Sound.wav")
                .onTap { sender in
                    print("🔴 Kingfisher@背景图 1 tapped, selected=\(sender.isSelected)")
                    "点击了Kingfisher@背景图".toast
                }
                .onLongPress(minimumPressDuration: 0.8) { btn, gr in
                    if gr.state == .began {
                        btn.alpha = 0.6
                        print("长按开始 on \(btn)")
                    } else if gr.state == .ended || gr.state == .cancelled {
                        btn.alpha = 1.0
                        print("长按结束")
                    }
                },
            UIButton.sys()
                .byTitle("我是UIButton主标题@Kingfisher").byTitleColor(.red)
                .bySubTitle("我是UIButton副标题@Kingfisher").bySubTitleColor(.yellow)
                .kf_imageURL("https://picsum.photos/" + ScreenWidth().toString(0) + "/" + self.marqueeHeight.toString(0))
                .kf_placeholderImage("唐老鸭".img)
                .kf_options([
                    .processor(DownsamplingImageProcessor(size: CGSize(width: 500, height: 200))),
                    .scaleFactor(UIScreen.main.scale),
                    .cacheOriginalImage,
                    .transition(.fade(0.25)),
                    .retryStrategy(DelayRetryStrategy(maxRetryCount: 2, retryInterval: .seconds(1)))
                ])
                .kf_bgNormalLoad()// 之前是配置项,这里才是真正决定渲染背景图/前景图
                .byTapSound("Sound.wav")
                .onTap { sender in
                    print("🔴 Kingfisher@背景图 2 tapped, selected=\(sender.isSelected)")
                    "点击了Kingfisher@背景图".toast
                }
                .onLongPress(minimumPressDuration: 0.8) { btn, gr in
                    if gr.state == .began {
                        btn.alpha = 0.6
                        print("长按开始 on \(btn)")
                    } else if gr.state == .ended || gr.state == .cancelled {
                        btn.alpha = 1.0
                        print("长按结束")
                    }
                },
            UIButton.sys()
                .byTitle("我是UIButton主标题@Kingfisher").byTitleColor(.red)
                .bySubTitle("我是UIButton副标题@Kingfisher").bySubTitleColor(.yellow)
                .kf_imageURL("https://picsum.photos/" + ScreenWidth().toString(0) + "/" + self.marqueeHeight.toString(0))
                .kf_placeholderImage("唐老鸭".img)
                .kf_options([
                    .processor(DownsamplingImageProcessor(size: CGSize(width: 500, height: 200))),
                    .scaleFactor(UIScreen.main.scale),
                    .cacheOriginalImage,
                    .transition(.fade(0.25)),
                    .retryStrategy(DelayRetryStrategy(maxRetryCount: 2, retryInterval: .seconds(1)))
                ])
                .kf_bgNormalLoad()// 之前是配置项,这里才是真正决定渲染背景图/前景图
                .byTapSound("Sound.wav")
                .onTap { sender in
                    print("🔴 Kingfisher@背景图 3 tapped, selected=\(sender.isSelected)")
                    "点击了Kingfisher@背景图".toast
                }
                .onLongPress(minimumPressDuration: 0.8) { btn, gr in
                    if gr.state == .began {
                        btn.alpha = 0.6
                        print("长按开始 on \(btn)")
                    } else if gr.state == .ended || gr.state == .cancelled {
                        btn.alpha = 1.0
                        print("长按结束")
                    }
                },
        ])
        .byBgColor(.randomColor)
        .byAddTo(self.scrollView) { [unowned self] make in
            make.top.equalTo(self.sdWebImageButtonsMarquee.snp.bottom).offset(self.verticalSpacing)
            make.left.right.height.equalTo(self.upContinuousMarquee)
            // 🔚 最后一条封底,决定 scrollView.contentSize.height
            if #available(iOS 11.0, *) {
                make.bottom.equalTo(self.scrollView.contentLayoutGuide.snp.bottom).inset(20)
            } else {
                make.bottom.equalTo(self.scrollView.snp.bottom).inset(20)
            }
        }
}()2.15.4、计划任务(内核基于JobsSwiftTimer)#
import JobsSwiftTaskCenter

let task = JobsPlan.after(.second * 2).do {
    print("2 秒后执行")
}2.15.5、红包雨#
private lazy var rainView: RedPacketRainView = {
      RedPacketRainView
          .dsl(
              config: RedPacketRainConfig(
                  // 你可以改成 .default,或者继续用这套 Demo 配置
                  spawnInterval: 0.2,
                  minFallDuration: 5.5,
                  maxFallDuration: 8.0,
                  packetSize: CGSize(width: 44, height: 54),
                  maxConcurrentCount: 80,
                  spawnInsets: .init(top: 0, left: 10, bottom: 0, right: 10),
                  tapEnabled: true,
                  packetImage: nil
              ),
              timerKind: .gcd
          )
          .onPacketTap { [weak self] _, count in
              guard let self else { return }
              self.countLabel.byText("已抢到:\(count) 个")
          }
          .byAddTo(view) { [unowned self] make in
              make.edges.equalToSuperview()
          }
}()2.15.6、网络数据的监听#
监听:数据来源 + 上行⬆️ / 下载⬇️
networkNormalListenerBy(view) // 普通文本
networkRichListenerBy(view) // 富文本
/// 手动移除 deinit { JobsNetworkTrafficMonitorStop() /// 停止网络实时监听 }监听第一次数据源
jobsWaitNetworkDataReady(
   onWiFiReady: {
       print("✅ Wi-Fi 已有真实流量")
   },
   onCellularReady: {
       print("✅ 蜂窝已实际可用,可以走后续逻辑")
       // 比如这里再去重试接口、发起播放等
   }
)
/// 手动移除 deinit { JobsCancelWaitNetworkDataReady() /// 停止网络数据源监听 }
2.15.7、旋转的抽奖轮盘#
private lazy var wheelView: LuckyWheelView = {
    LuckyWheelView()
        .bySegments([
            .init(text: "一等奖".tr,
                  textFont: .systemFont(ofSize: 12, weight: .medium),
                  textColor: .randomColor,
                  backgroundColor: .randomColor,
                  placeholderImage: "globe".sysImg,
                  imageURLString:"https://picsum.photos/30"),
            .init(text: "二等奖".tr,
                  textFont: .systemFont(ofSize: 12, weight: .medium),
                  textColor: .randomColor,
                  backgroundColor: .randomColor,
                  placeholderImage: "plus".sysImg,
                  imageURLString:"https://picsum.photos/30"),
            .init(text: "三等奖".tr,
                  textFont: .systemFont(ofSize: 12, weight: .medium),
                  textColor: .randomColor,
                  backgroundColor: .randomColor,
                  placeholderImage: "message".sysImg,
                  imageURLString:"https://picsum.photos/30"),
            .init(text: "谢谢参与".tr,
                  textFont: .systemFont(ofSize: 12, weight: .medium),
                  textColor: .randomColor,
                  backgroundColor: .randomColor,
                  placeholderImage: "tray".sysImg,
                  imageURLString:"https://picsum.photos/30"),
        ])
        .byPointerDirection(.right) // 停止锚点作为中奖结果
        .bySpinDuration(3.0)
        .byInitialVelocity(25.0)
        .byPanRotationEnabled(true)
        .onSegmentTap { segment in
            /// 短按和旋转停止后的中奖结果
            toastBy("🍀 短按扇形 \(String(describing: segment.text?.rnl))")
        }
        .onSegmentLongPress { segment, gr in
            if gr.state == .began {
                toastBy("👆 长按开始 \(String(describing: segment.text?.rnl))")
            }
        }
        .byAddTo(view) { make in
            make.center.equalToSuperview()
            make.width.height.equalTo(300)
        }
}()
wheelView.stopSpin() // 停止
2.16、进度条#
2.16.1、系统进度条#
/// 进度条(显示剩余/已完成比例,取决于 progressMode)
private lazy var progressView: UIProgressView = {
    UIProgressView(progressViewStyle: .default)
        .byProgress(0)
        .byAddTo(view) { [unowned self] make in
            make.top.equalTo(self.timeLabel.snp.bottom).offset(20)
            make.left.equalToSuperview().offset(horizontalInset)
            make.right.equalToSuperview().inset(horizontalInset)
        }
}()2.16.2、自定义进度条(内核基于JobsSwiftTimer) ➤ JobsProgressBar#
/// 自定义进度条
private lazy var progressView: JobsProgressBar = {
    JobsProgressBar()
        .byDirection(.leftToRight)
        .byValueMode(.countDown)           // 初始:显示为 100→0
        .byTrackColor(.systemGray5)        // 你外层灰条在父视图,这里清空即可
        .byTrackHorizontalInset(0)         // ✅ 不要内部留边
        .byTrackVerticalInset(0)           // ✅ 不要内部留边
        .byTrackThickness(nil)             // ✅ 厚度 = JobsProgressBar.height(也就是父视图高度)
        .byAutoHideLabel(true)             // ✅ 小高度自动隐藏 label(12 高会隐藏)
        .byLabelMinVisibleHeight(18)
        .byLabelBackgroundColor(.secondarySystemBackground)
        .byLabelFont(.monospacedDigitSystemFont(ofSize: 12, weight: .medium))
        .byAddTo(view) { [unowned self] make in
            make.top.equalTo(modeToggleButton.snp.bottom).offset(24.h)
            make.left.equalToSuperview().offset(40.w)
            make.right.equalToSuperview().inset(40.w)
            make.height.equalTo(20.h)
        }
}()2.17、雪花算法的Swift实践#
SnowflakeSwift(IDCID: 4, machineID: 30).nextID() 2.18、对字符串的封装#
2.18.1、多语言化#
"🔑 注册登录".tr2.18.2、通用格式的转换#
 "123".toInt()
 // ✅ 输出:123
 // 📘 说明:将字符串转为 Int,如果包含非数字字符则返回 nil

 "9876543210".toInt64()
 // ✅ 输出:9876543210
 // 📘 说明:适用于超出 Int 范围的大整数

 "3.14159".toDouble()
 // ✅ 输出:3.14159
 // 📘 说明:支持小数点与千分位(如 "1,234.56" → 1234.56)

 "3.1".toDouble(2, 2)
 // ✅ 输出:3.10
 // 📘 说明:限制最多 2 位小数,最少也显示 2 位(自动补零)

 "123.45".toFloat()
 // ✅ 输出:123.45
 // 📘 说明:浮点数版本(精度略低于 Double)

 "true".toBool()     // ✅ true
 "False".toBool()    // ✅ false
 "YES".toBool()      // ✅ true
 "no".toBool()       // ✅ false
 "1".toBool()        // ✅ true
 "0".toBool()        // ✅ false
 "maybe".toBool()    // ❌ nil(无法识别)
 // 📘 说明:大小写不敏感

 "你好".toNSString
 // ✅ 输出:NSString("你好")
 // 📘 说明:Swift String 转 Foundation NSString

 "Hello".rich
 // ✅ 输出:NSAttributedString("Hello")
 // 📘 说明:将普通字符串转为富文本(无样式)

 "红色加粗".rich([
     .foregroundColor: UIColor.red,
     .font: UIFont.boldSystemFont(ofSize: 18)
 ])
 // ✅ 输出:红色加粗(富文本样式)
// 📘 说明:附加字体与颜色属性2.18.3、字符串加载图片资源#
取本地图片
/// 本地图像名(在 Assets 中放一张叫 "Ani" 的图) localImageView.image = "Ani".img取网络图片@Kingfisher
/// UIImageView字符串网络图@Kingfisher
private lazy var asyncImgView: UIImageView = {
    let imageView = UIImageView()
        .byContentMode(.scaleAspectFill)
        .byClipsToBounds()
        .byAddTo(scrollView) { [unowned self] make in
            make.top.equalTo(localImgView.snp.bottom).offset(20)
            make.left.equalTo(scrollView.frameLayoutGuide.snp.left).offset(20)
            make.right.equalTo(scrollView.frameLayoutGuide.snp.right).inset(20)
            make.height.equalTo(180)
        }
    Task {
        do {
            imageView.byImage(try await "https://picsum.photos/200/300".kfLoadImage())
            print("✅ 加载成功 (KF async)")
        } catch {
            print("❌ 加载失败 (KF async):\(error)")
        }
    }
    return imageView
}()
/// UIImageView网络图(失败兜底图)@Kingfisher private lazy var wrapperImgView: UIImageView = { UIImageView() .byContentMode(.scaleAspectFill) .byClipsToBounds() .kf_setImage("https://picsum.photos/200", placeholder: "Ani".img) .byAddTo(scrollView) { [unowned self] make in make.top.equalTo(asyncImgViewSD.snp.bottom).offset(20) make.left.equalTo(scrollView.frameLayoutGuide.snp.left).offset(20) make.right.equalTo(scrollView.frameLayoutGuide.snp.right).inset(20) make.height.equalTo(180) } }()
2.18.4、字符串打开#
打开网站 /
Scheme(带参)"www.baidu.com".open() "https://example.com/search?q=中文 关键词".open()打电话(仅支持真机)
"13434343434".call()发邮件(带参)
"test@qq.com".mail()"ops@company.com".mail( subject: "反馈", body: "你好,遇到一个问题..." )"a@b.com,c@d.com".mail( subject: "日报", body: "<b>今天完成:</b><br/>1. xxx<br/>2. yyy", isHTML: true, cc: ["pm@company.com"], bcc: ["boss@company.com"] ) { result in print("mail result = \(result)") }
2.18.5、🍡 字符串取色🎨(校验规定格式)🔼 🔽#
/// 支持格式:
/// "#RRGGBB" / "RRGGBB" / "0xRRGGBB"
/// "#RGB"   / "RGB"
/// "#AARRGGBB" / "AARRGGBB"

"#353a3e".cor          // OK → 正常色
"353a3e".cor           // OK
"0x353a3e".cor         // OK
"#FFF".cor             // OK → 展开成 #FFFFFF
"80FF0000".cor         // OK → alpha=0x80, red
"乱七八糟".cor         // ❌ → 直接红色

"80FF0000".cor(alpha: 1) // alpha 走字符串里的 0x80,而不是你传的 1
"垃圾".cor(.black) // 非法 → black2.18.6、对全局普通的字符串进行多语言国际化的处理 🔼 🔽#
2.18.7、富文本相关 🔼 🔽#
数据层(转换)
把普通字符串升格为富文本字符串
NSAttributedString(string: s)把富文本字符串降格为普通字符串
a.string
UI层(设置)
UILabel().richTextBy(runs, paragraphStyle: ps)UIButton.sys() /// 富文本字@设置主标题 .byRichTitle(JobsRichText.make([ JobsRichRun(.text("¥99")).font(.systemFont(ofSize: 18, weight: .semibold)).color(.systemRed), JobsRichRun(.text(" /月")).font(.systemFont(ofSize: 16)).color(.white) ])) /// 富文本字@设置副标题 .byRichSubTitle(JobsRichText.make([ JobsRichRun(.text("原价 ")).font(.systemFont(ofSize: 12)).color(.white.withAlphaComponent(0.8)), JobsRichRun(.text("¥199")).font(.systemFont(ofSize: 12, weight: .medium)).color(.systemYellow) ]))UITextView().richTextBy(runs, paragraphStyle: ps)UITextView() .byAttributedText(NSMutableAttributedString( string: "🔗 默认蓝色链接(系统样式):", attributes: [ .font: UIFont.systemFont(ofSize: 15), .foregroundColor: UIColor.secondaryLabel ]) .byAdd(NSAttributedString( string: " Apple 官网", attributes: [ .link: URL(string: "https://www.apple.com")!, .font: UIFont.boldSystemFont(ofSize: 16) ])) .byAdd(NSAttributedString( string: "\n客服电话:400-123-4567", attributes: [.font: UIFont.systemFont(ofSize: 15)] )))UITextField().richTextBy(runs, paragraphStyle: ps)
配置层
富文本@图
// 图标附件
let image = UIImage(systemName: "paperclip", withConfiguration: config)!
let att = NSTextAttachment()
att.image = image

let ps = jobsMakeParagraphStyle {
    $0.alignment = .center
    $0.lineSpacing = 2
}

let runs: [JobsRichRun] = [
    JobsRichRun(.attachment(att, CGSize(width: 16, height: 16))),
    JobsRichRun(.text("  附件说明"))
        .font(.systemFont(ofSize: 15))
        .color(.secondaryLabel)
]
下划线
// 段落样式
let ps = jobsMakeParagraphStyle {
    $0.alignment = .center
    $0.lineSpacing = 6
}
// 富文本配置数组
let runs: [JobsRichRun] = [
    JobsRichRun(.text("欢迎使用 "))
        .font(.systemFont(ofSize: 18))
        .color(.secondaryLabel),

    JobsRichRun(.text("JobsRichText "))
        .font(.boldSystemFont(ofSize: 18))
        .color(.systemBlue)
        .underline(.single, color: .systemBlue),

    JobsRichRun(.text("封装示例"))
        .font(.systemFont(ofSize: 18))
        .strike(.single, color: .systemRed)
]
超链接
let ps = jobsMakeParagraphStyle {
    $0.alignment = .center
    $0.lineSpacing = 4
}

let runs: [JobsRichRun] = [
    JobsRichRun(.text("如需帮助,请联系 "))
        .font(.systemFont(ofSize: 15))
        .color(.secondaryLabel),

    JobsRichRun(.text("专属客服"))
        .font(.systemFont(ofSize: 15))
        .color(.systemBlue)
        .link("click://customer")
]
富文本点击事件
利用
UITextViewDelegate处理点击事件extension RichTextDemoVC: UITextViewDelegate { // MARK: ✅ iOS17+ 新 API @available(iOS 17.0, *) func textView(_ textView: UITextView, textItemMenuConfiguration configuration: UITextItem.MenuConfiguration, for textRange: UITextRange, point: CGPoint) -> UITextItem.MenuConfiguration? { // 可自定义菜单行为(复制/打开/分享) return configuration } @available(iOS 17.0, *) func textView(_ textView: UITextView, primaryActionFor textItem: UITextItem) -> UIAction? { switch textItem.content { case .link(let url): if url.scheme == "click" { print("点击事件") // 返回 nil 表示不执行系统默认行为 return nil } return nil default: // 非 link 类型的内容,保持默认 return nil } } // MARK: ✅ iOS16 及以下旧 API @available(iOS, introduced: 10.0, deprecated: 17.0, message: "Use textView(_:primaryActionFor:) on iOS17+ instead") func textView(_ textView: UITextView, shouldInteractWith URL: URL, in characterRange: NSRange, interaction: UITextItemInteraction) -> Bool { if URL.scheme == "click" { print("点击事件") return false } return true } }// 🔹订阅点击(RAC风格) textView.linkTap .observe(on: MainScheduler.instance) .subscribe(onNext: { [weak self] url in guard let self else { return } if url.scheme == "click" { self.presentAlert(for: url.absoluteString) } }) .disposed(by: disposeBag)
将不同的数据合二为一 ➤ 普通字符串➕富文本字符串
协议层
/// MARK: - 统一的「任意配置」协议(覆盖 UIView / UIViewController)
///  正向:byData(单参 + 不定参)
///  逆向:onResult + sendResult(单参 + 不定参)
@MainActor
/// ViewDataProtocol@单参数
public protocol ViewDataProtocol: AnyObject {
    /// 正向@入参
    @discardableResult
    func byData(_ data: Any?) -> Self
    /// 逆向@入参
    func sendResult(_ data: Any?)
    /// 逆向@出参
    @discardableResult
    func onResult(_ callback: @escaping (Any?) -> Void) -> Self
}
/// ViewDataProtocol@不定参数
public extension ViewDataProtocol {
    /// 正向@入参
    @_disfavoredOverload
    @discardableResult
    func byData(_ items: Any?...) -> Self {
        items.count == 1 ? byData(items[0]) : byData(items)
    }
    /// 逆向@入参
    @_disfavoredOverload
    func sendResult(_ items: Any?...) {
        if items.count == 1 { sendResult(items[0]) }
        else { sendResult(items) }
    }
    /// 逆向@出参
    @_disfavoredOverload
    @discardableResult
    func onResult(_ callback: @escaping ([Any?]) -> Void) -> Self {
        onResult { payload in
            if let arr = payload as? [Any?] {
                callback(arr)
            } else {
                callback([payload])
            }
        }
    }
}
/// ViewDataProtocol@默认空实现
public extension ViewDataProtocol {
    /// 正向@入参
    @discardableResult
    func byData(_ data: Any?) -> Self { self }
    /// 逆向@入参
    func sendResult(_ data: Any?) {}
    /// 逆向@出参
    @discardableResult
    func onResult(_ callback: @escaping (Any?) -> Void) -> Self { self }
}

public extension ViewDataProtocol {
    /// 逆向@无(入)参数;便捷重载,等价于“发一个nil”
    func sendResult() {
        sendResult(nil as Any?)
    }
}
应用层
private enum JobsViewResultKey {
    static var callback: UInt8 = 0
}
/// ✅ 覆盖所有 View(UIView 及其子类)
extension UIView: @retroactive ViewDataProtocol {}
@MainActor
public extension ViewDataProtocol where Self: UIView {
    // ================================== 正向:传值即渲染(默认 no-op) ==================================
    /// 默认实现:什么都不做,留给自定义 View/Cell 在自己的类里实现 `byData(_:)`
    @discardableResult
    func byData(_ any: Any?) -> Self { self }
    // ================================== 逆向:回传 ==================================
    @discardableResult
    func onResult(_ callback: @escaping jobsByAnyBlock) -> Self {
        objc_setAssociatedObject(self, &JobsViewResultKey.callback, callback, .OBJC_ASSOCIATION_COPY_NONATOMIC)
        return self
    }

    func sendResult(_ any: Any?) {
        (objc_getAssociatedObject(self, &JobsViewResultKey.callback) as? jobsByAnyBlock)?(any)
    }
}
@MainActor public extension ViewDataProtocol where Self: UICollectionViewCell { @discardableResult func byData(_ any: Any?) -> Self { self } }@MainActor public extension ViewDataProtocol where Self: UITableViewCell { @discardableResult func byData(_ any: Any?) -> Self { guard let cfg = any as? JobsBaseCellConfig else { return self } if #available(iOS 14.0, *) { return self .byJobsText(cfg.title) .bySecondaryJobsText(cfg.detail) .byImage(cfg.image) } else { if let title = cfg.title { textLabel?.byJobsAttributedText(title) } if let detail = cfg.detail { detailTextLabel?.byJobsAttributedText(detail) } if let image = cfg.image { imageView?.byImage(image) } return self } } }private enum JobsAssocKey { static var callback: UInt8 = 0 static var onAppearCompletions: UInt8 = 1 static var appearCompletionFired: UInt8 = 2 } /// ✅ 覆盖所有 ViewController(UIViewController 及其子类) extension UIViewController: @retroactive ViewDataProtocol {} @MainActor public extension ViewDataProtocol where Self: UIViewController { // ================================== 正向:传值即渲染(默认 no-op) ================================== /// 默认实现:什么都不做,留给子类 VC 自己实现 `byData(_:)` 去解析/渲染 @discardableResult func byData(_ any: Any?) -> Self { self } // ================================== 逆向:回传 ================================== @discardableResult func onResult(_ callback: @escaping jobsByAnyBlock) -> Self { objc_setAssociatedObject(self, &JobsAssocKey.callback, callback, .OBJC_ASSOCIATION_COPY_NONATOMIC) return self } func sendResult(_ any: Any?) { (objc_getAssociatedObject(self, &JobsAssocKey.callback) as? jobsByAnyBlock)?(any) } }
自定义数据(模型)层**
JobsCellConfig**数据模型里面的数据类型是**
JobsText**// MARK: - 通用于 UITableViewCell 和 UICollectionViewCell 的模型组件 public struct JobsCellConfig { public let title: JobsText? public let detail: JobsText? public let image: UIImage? public let data: Any? public init(title: JobsText? = nil, detail: JobsText? = nil, image: UIImage? = nil, data: Any? = nil) { self.title = title self.detail = detail self.image = image self.data = data } }枚举里面的值的类型是**
JobsText**// MARK: - 行模型 private enum EditProfileRow: CaseIterable { case avatar case nickname case gender var title: JobsText { switch self { case .avatar: return "头像" case .nickname: return "昵称" case .gender: return "性别" } } /// ❤️ 这里的字段“detail”,既可以是String类型,也可以是NSAttributedString类型。合二为一 var detail: JobsText? { switch self { case .avatar: return nil case .nickname: /// 富文本 return JobsText(JobsRichText.make([ JobsRichRun(.text("等级达到2级才能修改昵称")) .font(.systemFont(ofSize: 14)) .color(.systemRed), JobsRichRun(.text("Eric")) .font(.systemFont(ofSize: 14, weight: .semibold)) .color(.secondaryLabel) ])) case .gender: /// 普通文本 return "female" } }
数据灌入
tableView.byDequeueReusableCell(withType: BaseTableViewCellByValue1.self, for: indexPath)
    .byTitleFont(.systemFont(ofSize: 16))
    .byDetailTitleFont((.systemFont(ofSize: 14)))
    .bySelectionStyle(.none)
    .byAccessoryType(.disclosureIndicator)
    .bySeparatorInset(.init(top: 0, left: 16, bottom: 0, right: 16))
    .byData(JobsCellConfig(title: row.title,detail:row.detail))
数据解析(核心)
解析数据到
UILabelextension UILabel { @discardableResult func byJobsAttributedText(_ text: JobsText?) -> Self { guard let text else { return self } self.attributedText = text.asAttributed return self } @discardableResult func byJobsText(_ text: JobsText?) -> Self { guard let text else { return self } self.text = text.asString return self } }解析数据到
UITableViewCellpublic extension UITableViewCell { /// 解析为富文本 func byJobsAttributedText(_ text: JobsText?) -> Self { guard let text else { return self } if #available(iOS 14.0, *) { return byContentConfiguration { $0.attributedText = text.asAttributed } } else { self.textLabel?.attributedText = text.asAttributed return self }; } /// 解析为普通文本 func byJobsText(_ text: JobsText?) -> Self { guard let text else { return self } if #available(iOS 14.0, *) { return byContentConfiguration { $0.text = text.asString } } else { self.textLabel?.text = text.asString return self }; } }
2.18.8、条形码 🔼 🔽#
Code128 条形码(可指定目标尺寸;自动无插值放大)UIImageView().byImage(barContent.code128BarcodeImage(size: CGSize(width: 260, height: 100)))生成带底部文字的人类可读
Code128 条形码UIImageView().byImage(barContent.code128ByText(width: 260, barHeight: 100))
2.18.9、二维码 🔼 🔽#
纯二维码(中间无Logo)
UIImageView().byImage(qrContent.qrcodeImage(260))生成带中心 Logo 的二维码
UIImageView().byImage(
    "https://www.google.com".qrcodeImage(
        260,
        correction: "H",
        centerLogo: "Ani".img,
        logoRatio: 0.22,
        logoCornerRadius: 10,
        borderWidth: 6,
        borderColor: .white
    )
)
2.18.10、裁剪 🔼 🔽#
去掉首尾空白 / 换行
let raw = "  Hello World \n"
let cleaned = raw.byTrimmed
print(cleaned)  // "Hello World"
裁剪后非空才要这个字符串(否则用 nil)
let input = "   \n  "              // 用户乱输入的东西
let value = input.byTrimmedOrNil  // -> nil

let input2 = "  Jobs  "
let value2 = input2.byTrimmedOrNil // -> "Jobs"
判断一个字符串是不是非空的 http/https URL
let urlString = "  https://example.com/path  "

if urlString.isNonEmptyHttpURL {
    print("这是一个 http(s) URL")
} else {
    print("不是合法的 http(s) URL 字符串")
}
只要 http(s) 字符串,其他一律当 nil
let input = "  www.example.com  "
let httpString = input.asHttpURLOrNil   // -> nil

let input2 = "  https://example.com  "
let httpString2 = input2.asHttpURLOrNil // -> "https://example.com"
2.19、对点击事件的封装#
2.19.1、封装在UIControl 层的点击事件#
private lazy var toggle: UISwitch = {
    UISwitch()
        .onJobsChange { (sw: UISwitch) in
            print("开关状态:\(sw.isOn)")
        }
}()
private lazy var datePicker: UIDatePicker = { UIDatePicker() .byDatePickerMode(.date) .onJobsChange { (picker: UIDatePicker) in print("选择日期:\(picker.date)") } }()private lazy var slider: UISlider = { UISlider() .onJobsChange { (slider: UISlider) in print("滑块值:\(slider.value)") } }()private lazy var textField: UITextField = { UITextField() .onJobsEvent(.editingChanged) { (tf: UITextField) in print("文字变化:\(tf.text ?? "")") } }()private lazy var kindSeg: UISegmentedControl = { UISegmentedControl(items: ["Foundation", "GCD", "DisplayLink", "RunLoopCore"]) .bySelectedSegmentIndex(0) .byAddTo(view) { [unowned self] make in make.top.equalTo(self.view.safeAreaLayoutGuide.snp.top).offset(16) make.left.right.equalToSuperview().inset(16) make.height.equalTo(34) } .onJobsChange { [weak self] (_: UISegmentedControl) in self?.onKindChanged() } }()
2.19.2、封装在UIButton 层的点击事件#
let button = UIButton(type: .system)
    .byTitle("提交")
    .onTap { btn in
        print("✅ 使用 UIButton 专属 UIAction 实现")
}2.20、对弹出框的封装#
JobsToast自定义持续动画时间
JobsToast.show(
    text: "当前控制器销毁成功",
    config: JobsToast.Config()
        .byBgColor(.systemGreen.withAlphaComponent(0.9))
        .byCornerRadius(12)
        .duration = 2.5       // ⬅️ 停留 2.5s
)
自定义入场动画时间
JobsToast.show(
    text: "已保存",
    showDuration: 0.30   // ⬅️ 入场动画 0.30s(默认 0.18)
)
自定义事件
JobsToast.show(
    text: "点我重试",
    tap: { btn in
        print("用户点击了 Toast 按钮:\(btn)")
        /// TODO
    }
)
2.21、安全取Cell#
通过数组下标安全取Cell,即使越界也不会奔溃(只是去不到Cell值返回nil)
let cell = collectionView[section: 0, item: 3]
let cell = tableView[section: 0, row: 3]2.22、(全局)协议传参(支持不定参数)#
2.22.1、正向传参数:byData#
VC / View
/// 正向传入
DemoDetailVC().byData("https://www.baidu.com")
/// 获取(使用)
private var input: Any?
@discardableResult
func byData(_ any: Any?) -> Self {
    input = any
    return self
}
Cell
/// UITableViewDataSource
func tableView(_ tableView: UITableView,
               cellForRowAt indexPath: IndexPath) -> UITableViewCell {
    let row = sections[indexPath.section][indexPath.row]

    switch row {
    case .avatar:
        /// 用自定义的 AvatarCell 子类,在其子类中覆写byData
        return tableView.byDequeueReusableCell(
            withType: AvatarCell.self,
            for: indexPath
        ).byData(JobsCellConfig(title: row.title))
    default:
        /// 用系统默认的 UITableViewCell,在分类中统一处理数据
        return tableView.byDequeueReusableCell(withType: BaseTableViewCellByValue1.self, for: indexPath)
            .byTitleFont(.systemFont(ofSize: 16))
            .byDetailTitleFont((.systemFont(ofSize: 14)))
            .bySelectionStyle(.none)
            .byAccessoryType(.disclosureIndicator)
            .bySeparatorInset(.init(top: 0, left: 16, bottom: 0, right: 16))
            .byData(JobsCellConfig(title: row.title,detail:row.detail))
    }
}
/// 覆写 byData final class AvatarCell: UITableViewCell { @discardableResult /// 富文本的优先级比普通文本高。即,如果同时设置富文本和普通文本,优先展示富文本 func byData(_ any: Any?) -> Self { guard let cfg = any as? JobsCellConfig else { return self } if let title = cfg.title { textLabel?.byJobsAttributedText(title) } if let detail = cfg.detail { detailTextLabel?.byJobsAttributedText(detail) } if let image = cfg.image { avatarView.byImage(image) };return self } }#if os(OSX) import AppKit #elseif os(iOS) || os(tvOS) import UIKit #endif @MainActor public extension ViewDataProtocol where Self: UITableViewCell { @discardableResult func byData(_ any: Any?) -> Self { guard let cfg = any as? JobsCellConfig else { return self } if #available(iOS 14.0, *) { return self .byJobsText(cfg.title) .bySecondaryJobsText(cfg.detail) .byImage(cfg.image) } else { if let title = cfg.title { textLabel?.byJobsAttributedText(title) } if let detail = cfg.detail { detailTextLabel?.byJobsAttributedText(detail) } if let image = cfg.image { imageView?.byImage(image) } return self } } }
2.22.2、逆向传参数:sendResult ➤ onResult#
/// 逆向传入
sendResult("Jobs")
/// 获取(使用)
DemoDetailVC().onResult { name in
		print("回来了 \(name)")
}2.23、Debug模式下弹窗检测是否释放UIViewController#
引入框架
JobsSwiftDebugTools#if DEBUG import JobsSwiftDebugTools #endifApp入口处进行调用 ➤
AppDelegate.swift#if DEBUG VCDebugDeallocDebug.install() #endif
3、对抗记忆衰弱#
使用Xcode代码块的方式👉
JobsCodeSnippets脚本安装,自动注入系统指定目录,只需要重启Xcode即可使用
4、一些脚本库JobsGenesis#
原则上拒绝python,直接用Shell调用系统底层SDK来完成(高效)
5、将组件库Pod化#
def byJobs

  pod 'JobsSwiftDebugTools',                :path => 'JobsByPods/JobsSwiftDebugTools@Pods'
#  pod 'JobsNetworking/Core',                :path => 'JobsByPods/JobsNetworking@Pods' # iOS12/13/14... 都能用(主干)
#  pod 'JobsNetworking/AF4',                 :path => 'JobsByPods/JobsNetworking@Pods'
  pod 'JobsNetworking/Async',               :path => 'JobsByPods/JobsNetworking@Pods' # 只在 iOS13+ 工程里想用 async/await,再加这个
  pod 'JobsNetworking/AF5',                 :path => 'JobsByPods/JobsNetworking@Pods'

  pod 'BRPickerViewSwift',                  :path => 'JobsByPods/BRPickerViewSwift@Pods'
  pod 'JobsBy3rdTools',                     :path => 'JobsByPods/JobsBy3rdTools@Pods'
  pod 'JobsByUIKit',                        :path => 'JobsByPods/JobsByUIKit@Pods'
  pod 'JobsInheritance',                    :path => 'JobsByPods/JobsInheritance@Pods'
  pod 'Jobsl10n',                           :path => 'JobsByPods/Jobsl10n@Pods'
  pod 'JobsSwiftTimer',                     :path => 'JobsByPods/JobsSwiftTimer@Pods'                # https://github.com/JobsKits/JobsSwiftTimer
  pod 'JobsProgressBar',                    :path => 'JobsByPods/JobsProgressBar@Pods'
  pod 'JobsNavBar',                         :path => 'JobsByPods/JobsNavBar@Pods'
  pod 'JobsToast',                          :path => 'JobsByPods/JobsToast@Pods'
  pod 'JobsTextTools',                      :path => 'JobsByPods/JobsTextTools@Pods'
  pod 'JobsImageTools',                     :path => 'JobsByPods/JobsImageTools@Pods'
  pod 'JobsScale',                          :path => 'JobsByPods/JobsScale@Pods'
  pod 'JobsGetWindow',                      :path => 'JobsByPods/JobsGetWindow@Pods'
  pod 'JobsRefresher',                      :path => 'JobsByPods/JobsRefresher@Pods'
  pod 'JobsSwiftTools',                     :path => 'JobsByPods/JobsSwiftTools@Pods'
  pod 'JobsCountdownButton',                :path => 'JobsByPods/JobsCountdownButton@Pods'
  pod 'JobsMarqueeView',                    :path => 'JobsByPods/JobsMarqueeView@Pods'
  pod 'JobsEmptyView',                      :path => 'JobsByPods/JobsEmptyView@Pods'
  pod 'JobsGestureUnlock',                  :path => 'JobsByPods/JobsGestureUnlock@Pods'
  pod 'JobsCryptoKit',                      :path => 'JobsByPods/JobsCryptoKit@Pods'
  pod 'JobsLocalNotification',              :path => 'JobsByPods/JobsLocalNotification@Pods'
  pod 'JobsSwiftAppTools',                  :path => 'JobsByPods/JobsSwiftAppTools@Pods'
  pod 'JobsLuckyEnvelopeRain',              :path => 'JobsByPods/JobsLuckyEnvelopeRain@Pods'
  pod 'JobsSwiftStandardLibrary_extension', :path => 'JobsByPods/JobsSwiftStandardLibrary_extension@Pods'
  pod 'JobsSwiftFoundation_extensions',     :path => 'JobsByPods/Foundation@Pods'                     # https://github.com/JobsKits/Jobs.Swift.Foundation.Extensions
  pod 'JobsSwiftMetalKit_extensions',       :path => 'JobsByPods/MetalKit@Pods'                       # https://github.com/JobsKits/Jobs.Swift.MetalKit.Extensions
  pod 'JobsSwiftBlock',                     :path => 'JobsByPods/JobsSwiftBlock@Pods'                 # https://github.com/JobsKits/JobsSwiftBlock
  pod 'JobsSwiftBaseDefines',               :path => 'JobsByPods/JobsSwiftBaseDefines@Pods'                   # https://github.com/JobsKits/JobsSwiftBaseDefines
  pod 'JobsSwiftBaseTools',                 :path => 'JobsByPods/JobsSwiftBaseTools@Pods'             # https://github.com/JobsKits/JobsSwiftBaseTools
end四、BaseURL构架#
- 移动端App需要预埋一组URL
- 每次发包的时候,可以进行更替/每次启动移动端App也可以进行更新(具体看具体业务场景设计)
- 这一组URL的请求结果➤拿到真实的移动端App请求的BaseURL
- 这一组URL实际上是服务器矩阵(以应对IP封锁)
- 真实的App里面具体请求对应的BaseURl程序员都不知是什么。前端开发人员只需要面对接口,而不需要关心BaseURL
- 那么在移动端App开屏进入页面的时候,就需要有自检环节(前端配合进度条等UI反馈)
- 先测试预埋的一组URL的可达性(本地开启轮询测试)
- 然后再通过这一组URL拉取实际请求的BaseURL(可以是一个组)
- 自检环节,之前亚博是控制在10~15秒
- 全局的BaseURL是浮动的,内部需要有一个实时监控机制,如果在使用过程中BaseURL变的不可达,那么就需要在这一组BaseURL去找可用的BaseURL顶上